Merchant Console: Multi-Merchant Users
For companies that have multiple merchant accounts, the Multi-Merchant User screen can be used to set the permissions of users with access to one or more of the individual merchant accounts.
Each merchant account, as well as the Multi-Merchant users screen, can be accessed via the drop down menu located at the bottom right of the Merchant Console banner at the top of your screen. From this menu you can access each of your merchant accounts and all of the Console functions that they are enabled for including the vTerminal, Settings, Fraud Module configuration and more.
When you select "edit user access" at the bottom of the menu, you will be brought to a screen that will allow you to edit your multi-merchant user accounts, change user permissions and passwords, as well as add new users.
The list of Multi-Merchant users includes usernames, denotes the master account status of the user, and displays the last login of the user. Each user can be edited, deleted, or have their password changed.

Adding and Editing a Multi-Merchant User
You can always edit a user account by clicking on the Edit button to the right of their username. You will be able to change any of the user's permissions and their start page as well as limiting the number of IP addresses from which they can log in, and determine which merchant accounts they will have access to.
When adding a new user, you can set the default Two Factor Authentication level for that user. After the user is created, their Two Factor settings will be exclusively managed by them.
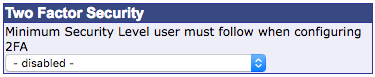
These security levels are:
- disabled
- Low: Allow Registering Computer
- Medium: Allow Registering Computer and IP
- High: Require two factor on every login
For further information, follow the link in the Two Factor Authentication section below.
Please note that you cannot change a user's password from this screen. To change a user's password you must use the Change Password link.
Restricting IP Access
When adding a new user or when editing an existing user account, you can select specific IP addresses from which the user can access the system and conduct transactions.
In the box below the username and start page menu, enter the IP addresses from which the user will be permitted to access the system. To allow a user to access the system from any IP address, leave the space empty. Your current IP address will appear below the text to the left of the box.
Merchant Access
This section allows you to determine both which of your merchant accounts the specified user will be able to access, as well as set their default merchant account.
Simply check the box to the left of each merchant account that you would like the user to have access to, then use the radio buttons in the far left column to choose which account will be set as the user's default.
User Permissions
To determine which functions a user can perform, set the user permissions on the right hand side of the Edit User screen.
If the user has a master account, simply check the Master box at the top. This will allow the user to perform all functions associated with your account, including issuing credits and voids, settling batches and viewing transaction details.
Alternatively you can restrict the types of functions a user can perform by selecting on certain boxes within the user permissions settings. For example, to allow a user to process sale transactions, voids and auth-onlies, but not settle batches, or issue refunds, simply check the boxes beside the permissions you want that user to have.
| Permission | Description |
|---|---|
| Master Account (full access) | Allow user to have permission for all account functions. |
| Virtual Terminal | Allow user to perform all functions within the virtual terminal, including sale, checks, void, auth-only, credit, and postauth |
| Sale | Allow user to process sale transactions. |
| Checks | Allow user to process electronic check transactions. |
| Void | Allow user to void transactions that have not been settled. |
| Credit | Allow user to issue credits. |
| Auth-Only | Allow user to process auth-only (authorization only) transactions. |
| Postauth | Allow user to process transactions requiring post authorization. |
| Sale Form | Allow user to process transactions using the Sale Form. |
| Recurring Billing | Allow user to perform all functions within the Recurring Billing Database including create, edit and delete customer accounts. |
| Create | Allow user to create customer accounts with recurring billing cycles. |
| Edit | Allow user to edit customers in the recurring billing database. |
| Delete | Allow user to delete customer record from the database. |
| VTerm | Allow user to process transactions from the vTerminal within the Customer Database. |
| Batch Manager | Allow user to perform all functions within the batch manager, including close batches, issue voids and credits, view transaction details and use the quick sale and quick credit functions. |
| Close Batches | Allow user to close batches. |
| Void/Credit/Queue | Allow user to issue voids and credits and move transactions out of the batch and into the queued transactions |
| Transaction Details | Allow user to view transaction details. Please note: Only users with Master Merchant Accounts and passwords can view full credit card data. |
| Quick Sale | Allow user to process sale transactions via the quick sale box on the transaction details page. |
| Quick Credit | Allow user to process credit transactions via the quick credit box on the transaction details page. |
| Queued Transactions | Allow user to view and post queued transactions from the Queued Transactions screen. |
| Check Manager | Allow user to perform all functions from within the Check Manager including view transaction details, and issue voids and refunds. |
| Transaction Details | Allow user to view transaction details for transactions in the check manager. |
| Upload Manager | Allow user to perform all functions within the Upload Manager including pause, delete and export uploaded batches. |
| Reports | Allow user to perform all functions in the reports section including view, export and print reports and create new custom reports. |
| Search | Allow user to use the search function. |
| Allow Password Change* | Allow user to change their own password. //Please Note: All users must change their password once every 90 days. If you do not give a user permission to change their password, they will still be able to change their password if it has expired. To avoid this, make sure to change their password once per 90 days.// |
Two Factor Authentication
You can also set up two factor authentication for your user. For more information about how to set up two factor authentication, click here.
Features
Reports
For companies with multiple merchant accounts, reports may be run on one or more of the accounts simultaneously. At the top of the reports page there will be an expandable subtitle bar telling you exactly which of your accounts is currently selected for reporting:

To expand the list of avaiable merchant accounts, click anywhere on the subtitle bar.
Add or remove merchant accounts from the list of those being reported on by selecting an account, then clicking the add or remove arrows between the two lists as necessary. Then click the save button below the lists and the subtitle bar menu will close so that you can run your reports.
Multi-user reports will then be displayed in the same way as single merchant reports. You can find more information on the Reports section of the merchant console here.
Account Settings and Fraud Module Configuration
The settings and fraud modules for each each account must be set individually. To change the settings or add fraud modules for a particular account, select the account you wish to modify from the drop down menu and proceed as usual.
More information on how to change your account settings can be found here.
More information on how to add and edit fraud modules can be found here.