Queued
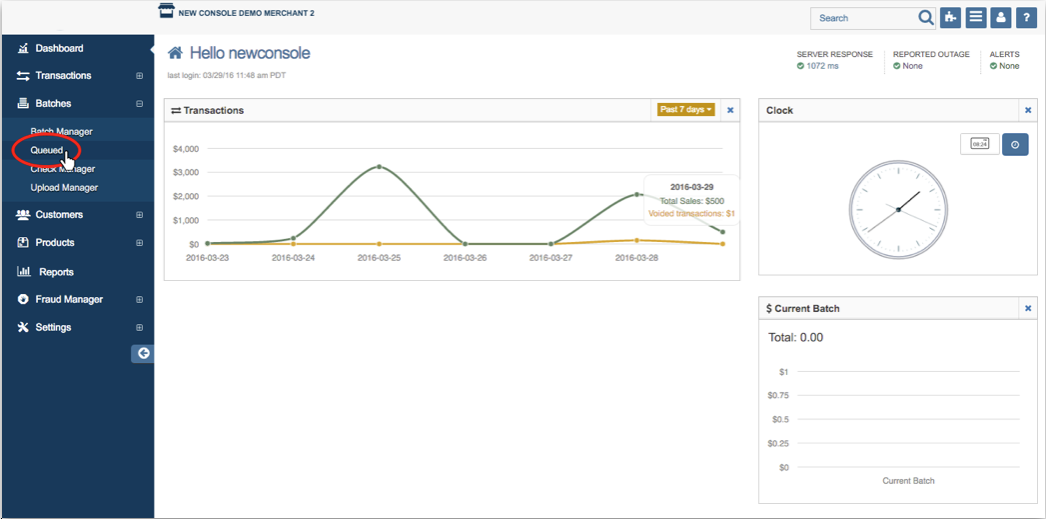
To access the Queued Transactions page, click on ‘Batches’ on the side menu bar of the Dashboard. Then click ‘Queued’ from the drop down menu to be taken to the ‘Queued Transactions’ page.
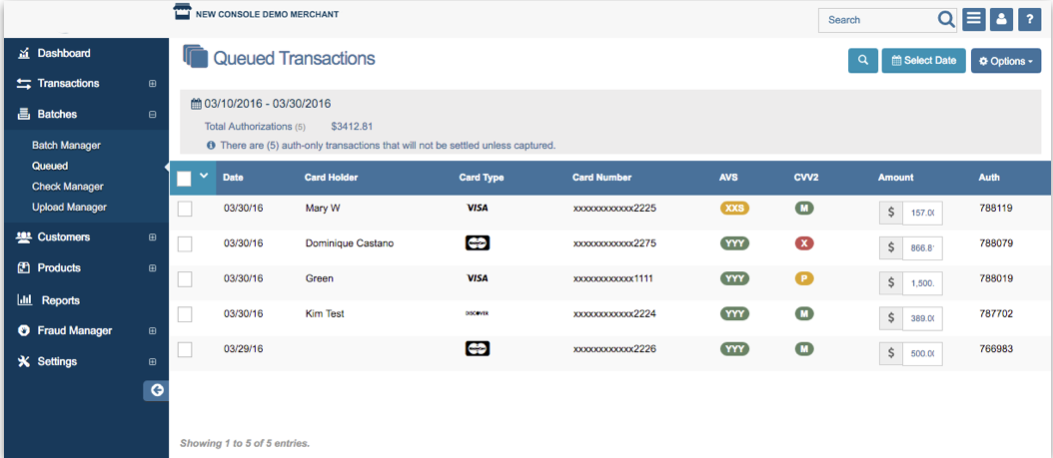
The Queued Transactions page is where Auth Only transactions are stored while waiting to be captured. Auth Only transactions must be captured and settled before they are funded. These transactions will remain in Queued Transactions for 30 days or until they have been captured.
Please Note: Most merchant banks will not allow an Auth Only transaction to be captured after 10 days. This time period, however, varies from bank to bank. If a transaction remains in the queue for longer than the merchant bank allows, you will need to re-run the transaction to obtain a new authorization code to complete the transaction.
Customize View
Your queued transactions are shown in a table including details such as the Date, Card Holder’s Name, Card Type, Card Number, AVS code, CVV2 code, Amount, and Authorization (Auth) Code.
Rearrange Table
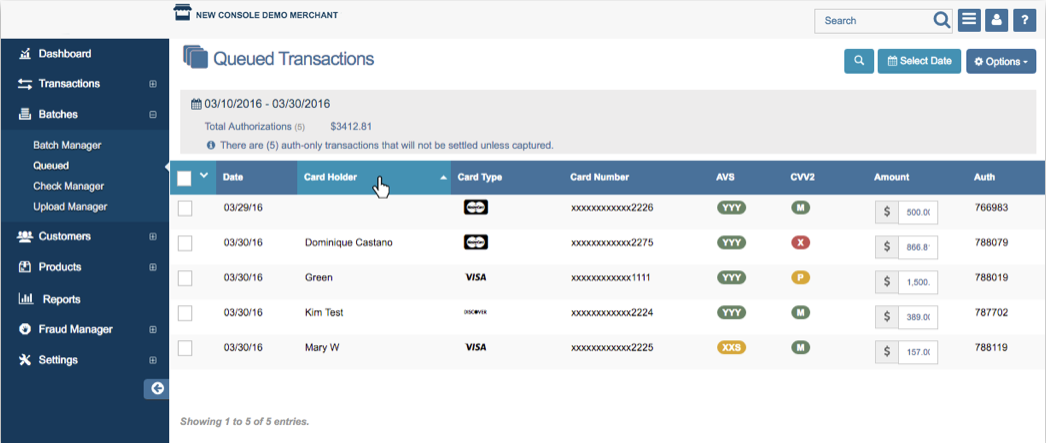
By default, your Queued Transactions are arranged by date, with your most recent Auth Only transaction at the top and the oldest Auth Only transaction at the bottom. This table can be rearranged based on the Card Holder’s First Name, Card Type, Card Number, Amount, or the Auth Code. To rearrange the table by the card holder’s name, for example, click on ‘Card Holder’ on the top bar of the table.
Customize Table
Customize your Queued Transactions table by adding or removing specific fields. To add or remove fields, click 'Options' then click on ‘Customize Table’ from the drop down menu.
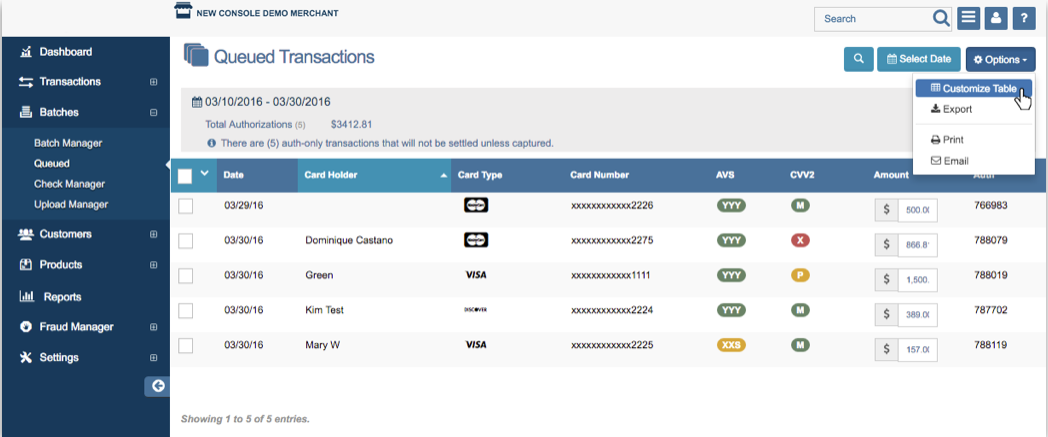
The ‘Table Options’ pop up window will appear showing your current fields and available fields. To add more columns into your current batch table, drag and drop a field button into the ‘Current Fields’ section. To remove a specific column, click the field button you want to remove and drag onto the ‘Available Fields’ section.
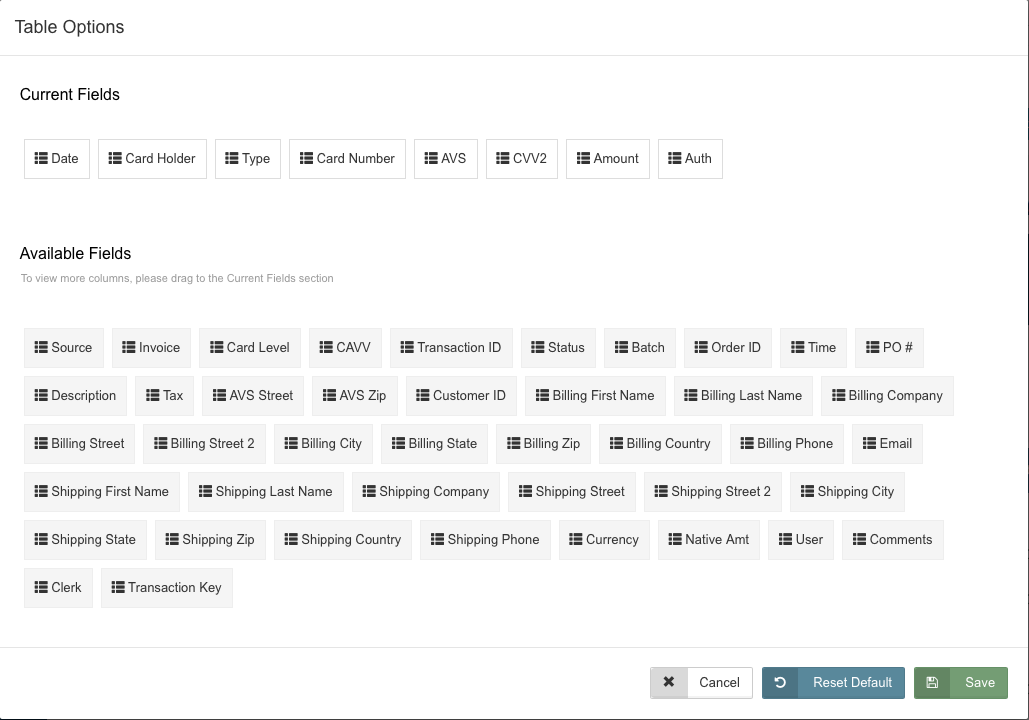
Once you have finished adding or deleting specific fields, click 'OK'. If you want to reset your table to default, click 'Reset Default'.
Search Transaction
Search by Field
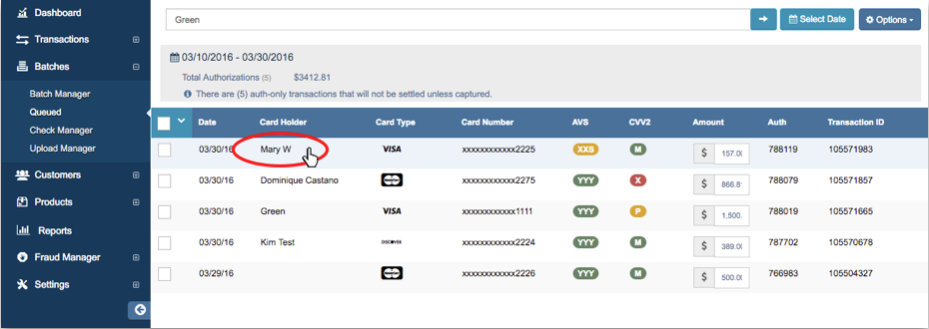
To search for a specific transaction, click the search icon located at the top right hand side of your Queued Transactions page. Search for Auth Only transactions by entering the last four digits of the Card Number, the Cardholder’s Name, the Transaction Amount, Authorization Code, or the Transaction ID in the search field.

As shown in the image below, the merchant is searching for a transaction by a customer’s name. Type in the name of the customer. Your Queued Transactions page will automatically show all transactions associated with that specific name.
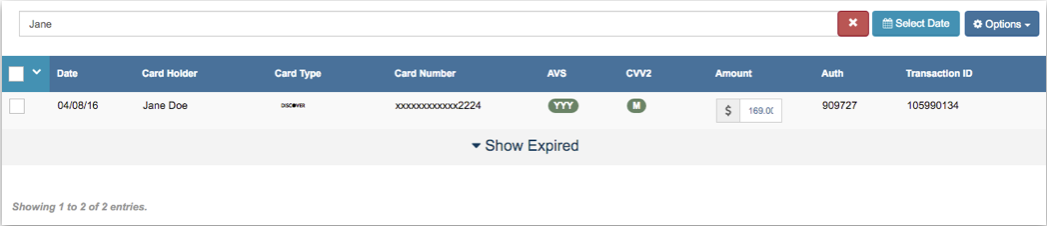
Please Note: You may also view all the expired transactions associated with your search, by clicking the ‘Show Expired’ drop down arrow at the bottom of the page.
Search by Date
From the Queued Transactions page, click on 'Select Date'.
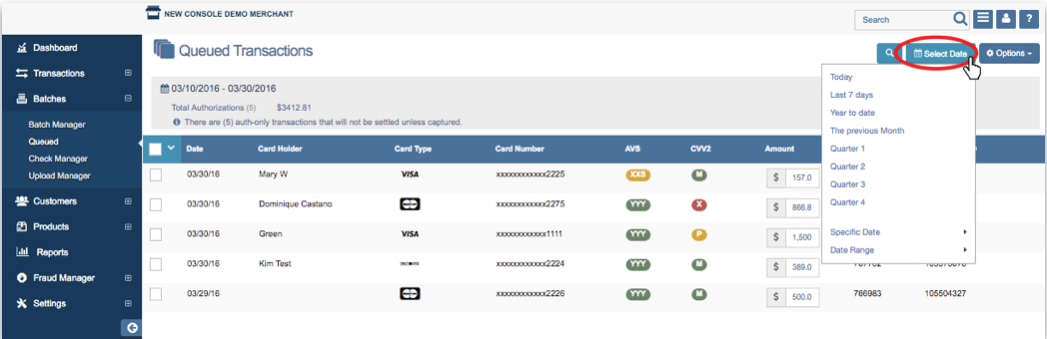
A drop down menu will appear showing the following options: ‘Today’, the ‘Last 7 days’, the ‘Year-To-Date’, the ‘Previous Month’, ‘Quarter 1’, ‘Quarter 2’, ‘Quarter 3’, ‘Quarter 4’, a ‘Specific Date’, and a specific ‘Date Range’. Click one of the options to view your transactions.
Please Note: You can only view the complete transaction details or edit the amount if the Auth Only transaction remains open or unsettled.
View Queued Transaction Details
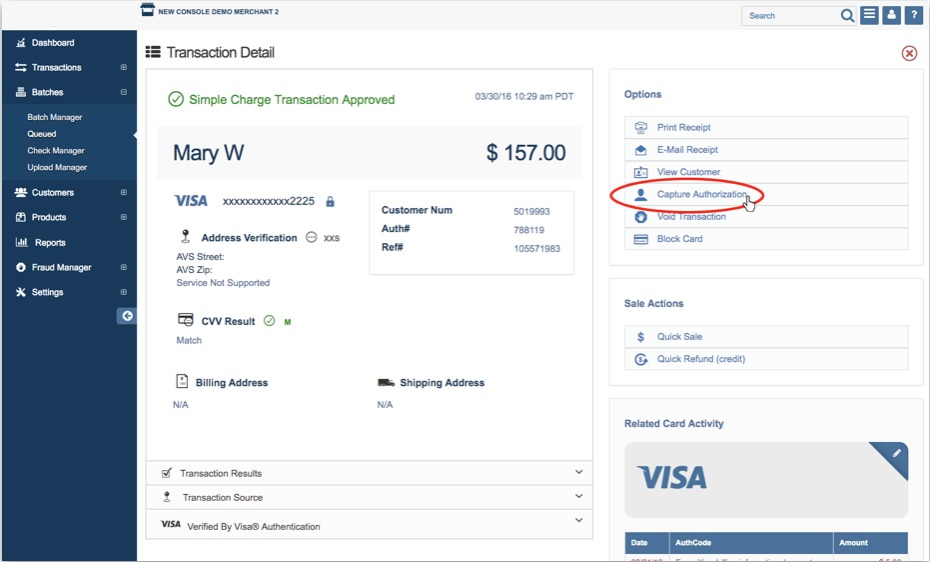
To view the complete details of a queued transaction, click on the transaction from the table.
The Transaction Detail page will display all of the same fields displayed when you access transactions from the Batch Manager.
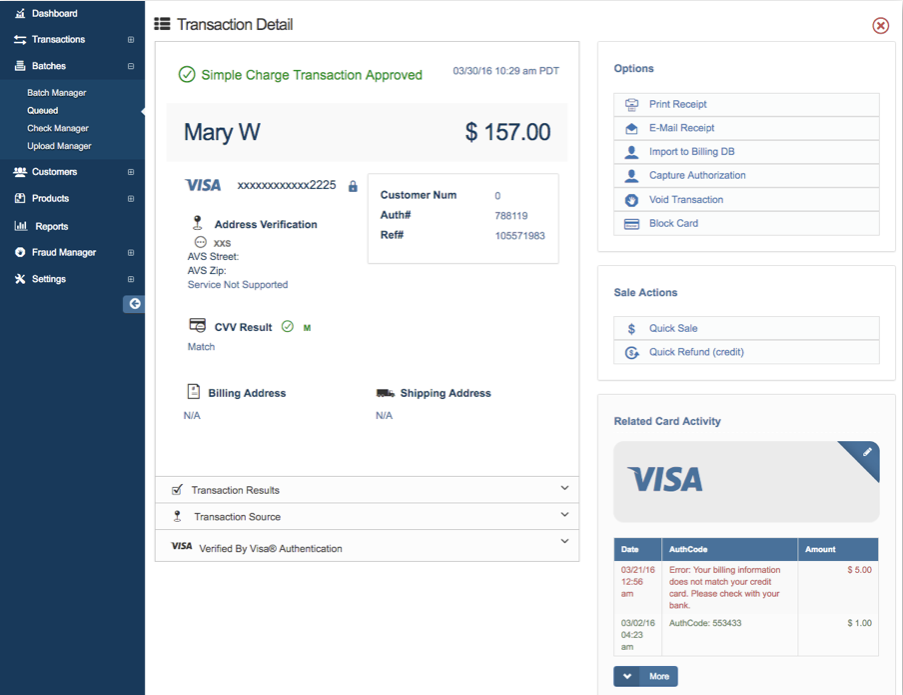
Please Note: The Transaction Results and Transaction Source information can be viewed by clicking on the drop down button as shown in the image above.
The following sale actions will also be displayed:
- Print Receipt
- Email Receipt
- Import to Billing DB (Database) - This adds the customer’s billing information to your database for recurring billing or payments
- Capture Authorization - This closes or settles the Auth Only charge see the Capture Queued Transaction section of this page.
- Void Transaction
- Block Card - This blocks the customer’s debit or credit card, causing future transactions against the card to be declined
- Quick Sale or Quick Refund
- View Related Card Activity - the section shows all the transactions made associate with the same card.
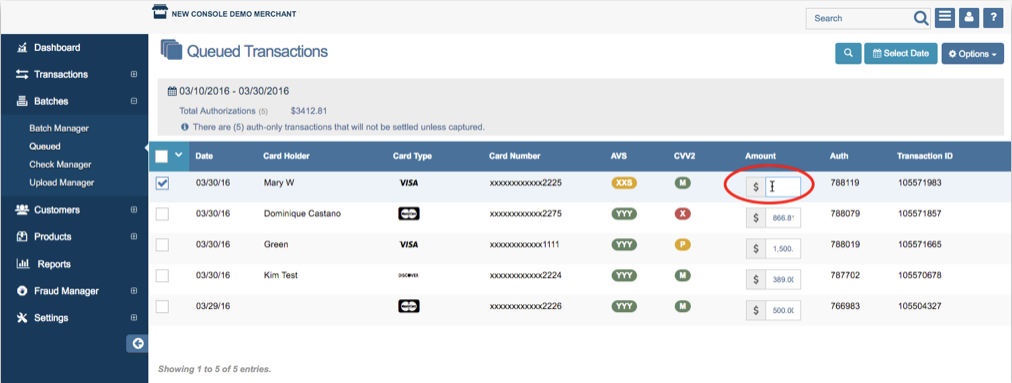
Adjust Amount
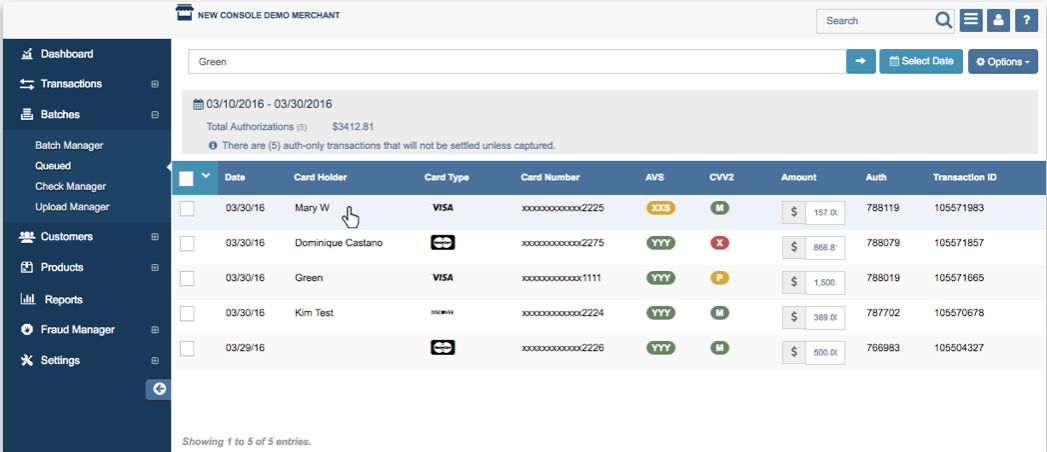
The Queued Transactions page allows you change the amount of the Auth Only transaction charge. Remember, Auth Only charge amounts are not final and can be changed until the transaction is captured and settled. As shown in the image below the column ‘Amount’ is editable. Click on the box in the 'Amount' column and enter the new amount.
Capture Queued Transaction
You can capture an Auth Only transaction from the Queued Transactions main page and from the Transaction Details page.See instructions for each below.
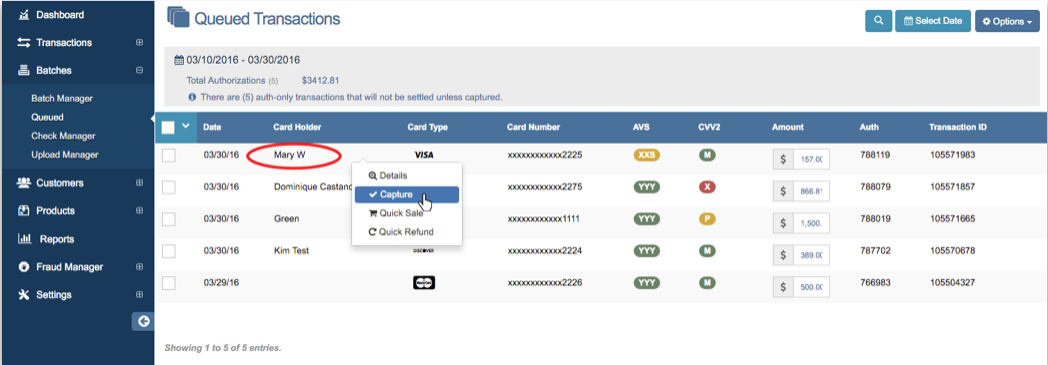
From Queued Transactions
Right-click on the transaction you want to close, then click ‘Capture’.
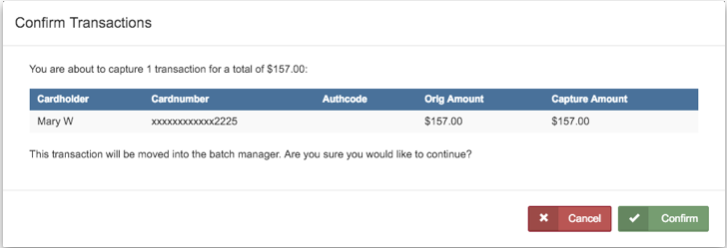
A pop up window will appear to confirm if you want to continue. Check to confirm if all the information is correct, then click 'Confirm'.
From Transaction Details
From the Queued Transactions page, click on the transaction you wish to capture.
Once you click the transaction, you will be taken to its Transaction Detail page. On the ‘Options’ section of the page, click on ‘Capture Authorization’.
A pop up window will appear to confirm the capture.
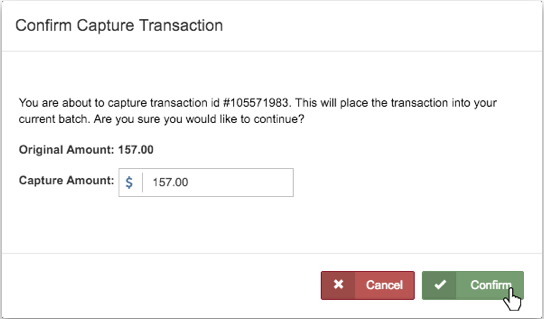
From this window, you can edit the ‘Capture Amount’ if necessary. When complete, click 'Confirm'.A confirmation will appear on the same window to confirm the if transaction was captured successfully.
Export Queued Report
To Export your Queued Transactions data, click 'Options' located at the top right hand side of your page. Select ‘Export’ from the drop down menu.

Select the desired file type: CSV, Tab Delimited, or JSON on the pop up window then click 'Export'.
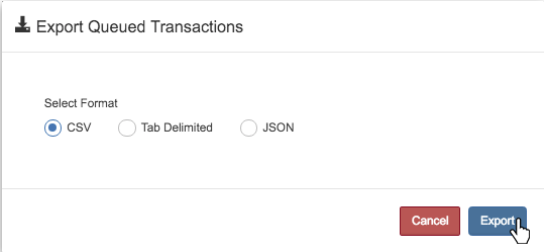
Your file will automatically download on your web browser.
Print Queued Report
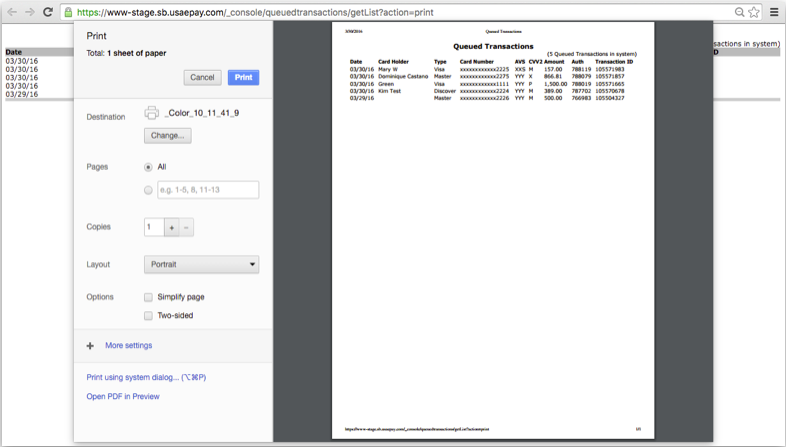
To Print your Queued Transactions data, click 'Options' located at the top right hand side of your page. Select ‘Print’ from the drop down menu.
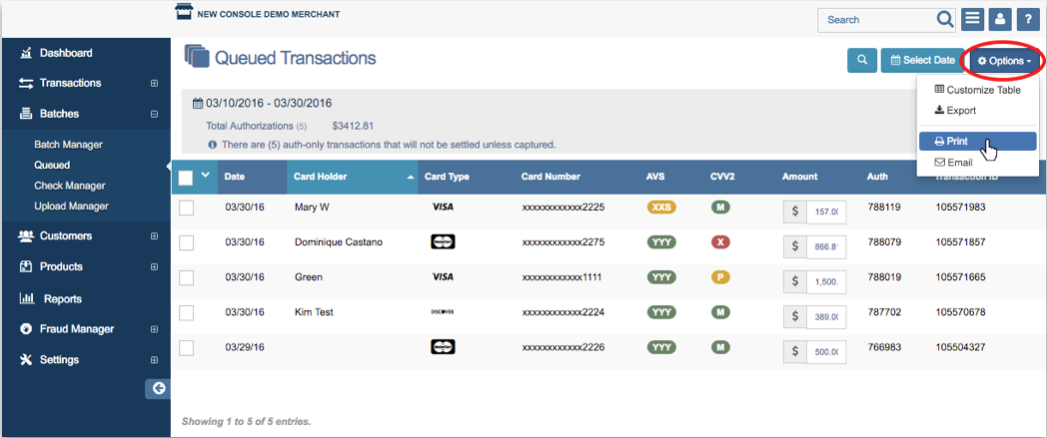
A PDF print window will pop up on your web browser, click 'Print' to print your PDF copy.
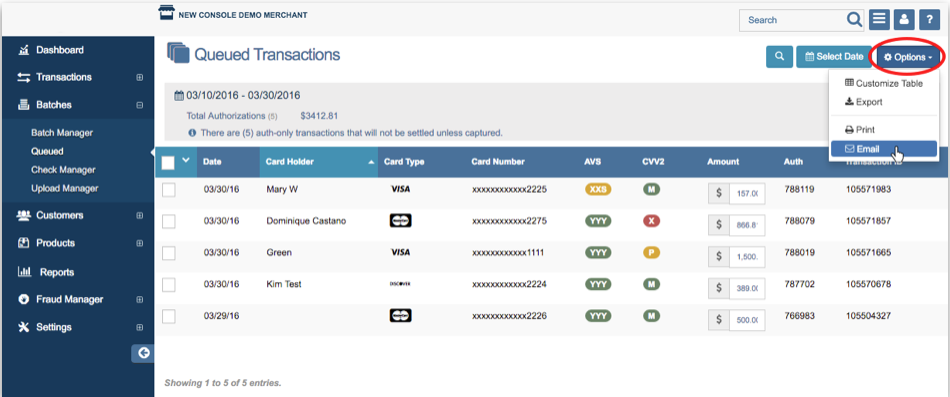
Email Queued Report
To Email your Queued Transactions data, click 'Options' located at the top right hand side of your page. Select ‘Email’ from the drop down menu.
The ‘Email Report’ pop up window will appear.
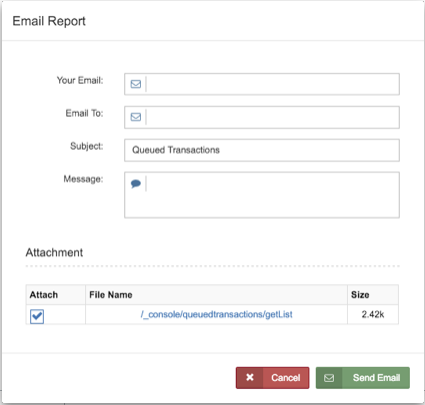
Fill in the following fields: ‘Your Email’, ‘Email To’, ‘Subject’, and ‘Message’. Check the Attach box, to attach a copy of the Queued Transactions and click 'Send Email.'
Please Note: The exported, printed, and emailed files will only contain information displayed on the Queued page. To add more fields into your files, see the Customize View section of this page.