Custom Fields
The merchant console allows you to create custom fields to add in your customers’ recurring billing profiles. To access your custom fields settings, click on ‘Settings’ from your side menu bar then select ‘Custom Fields’ from the drop down menu.
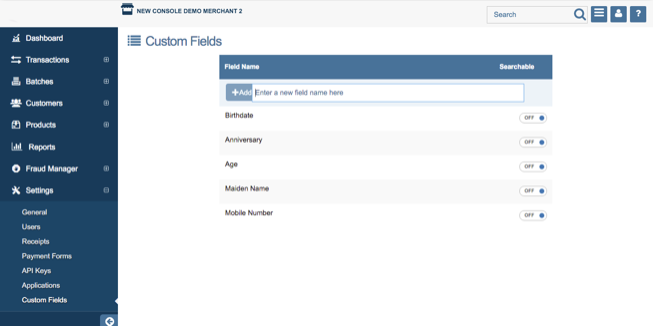
Your Custom Fields, as shown in the image above, is arranged by the date (oldest to newest).
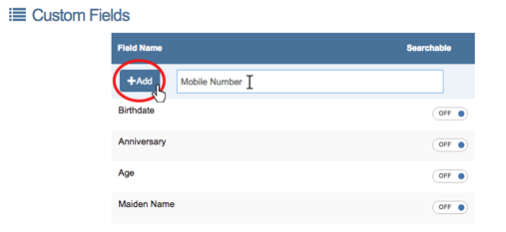
Add A Custom Field
To add a custom field, enter the name of the custom field on the open search field.
Once you enter the name of the custom field, click  . The new custom field will automatically be added on your list.
Please Note: The custom field will automatically be available in your ‘Custom Fields’ tab when adding a new customer or editing a customer’s information.
Make A Custom Field Searchable
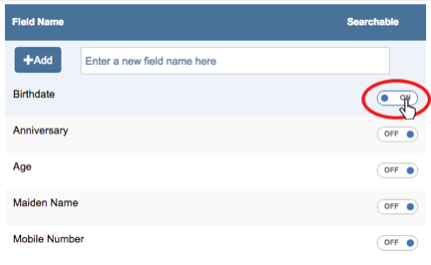
To make a custom field searchable, switch the  button to
  . See image below.
Please Note: If a custom field is searchable, you should be able to search it anywhere from an open search field in your merchant console.
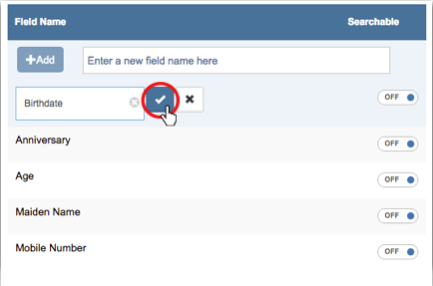
Rename A Custom Field
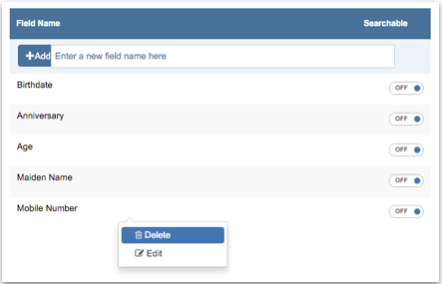
To rename a custom field, right click on the custom field you want to edit on your list then select ‘Edit’ as shown in the image below.

Please Note: You can also rename a custom field by simply clicking on it. Both methods will give you the same result.
Enter the new name of the custom field then click the  button to save it.
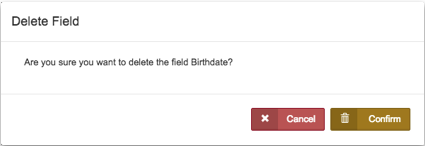
Delete A Custom Field
To delete a custom field from your list, right click on that field then select ‘Delete’. See image below.
A confirmation pop up window will appear. To confirm the deletion, click  .
.