New Order
The New Order form allows you process transactions that include the order, customer, and payment information. Through this form, you can add products from your database to the order as 'Line Items'.
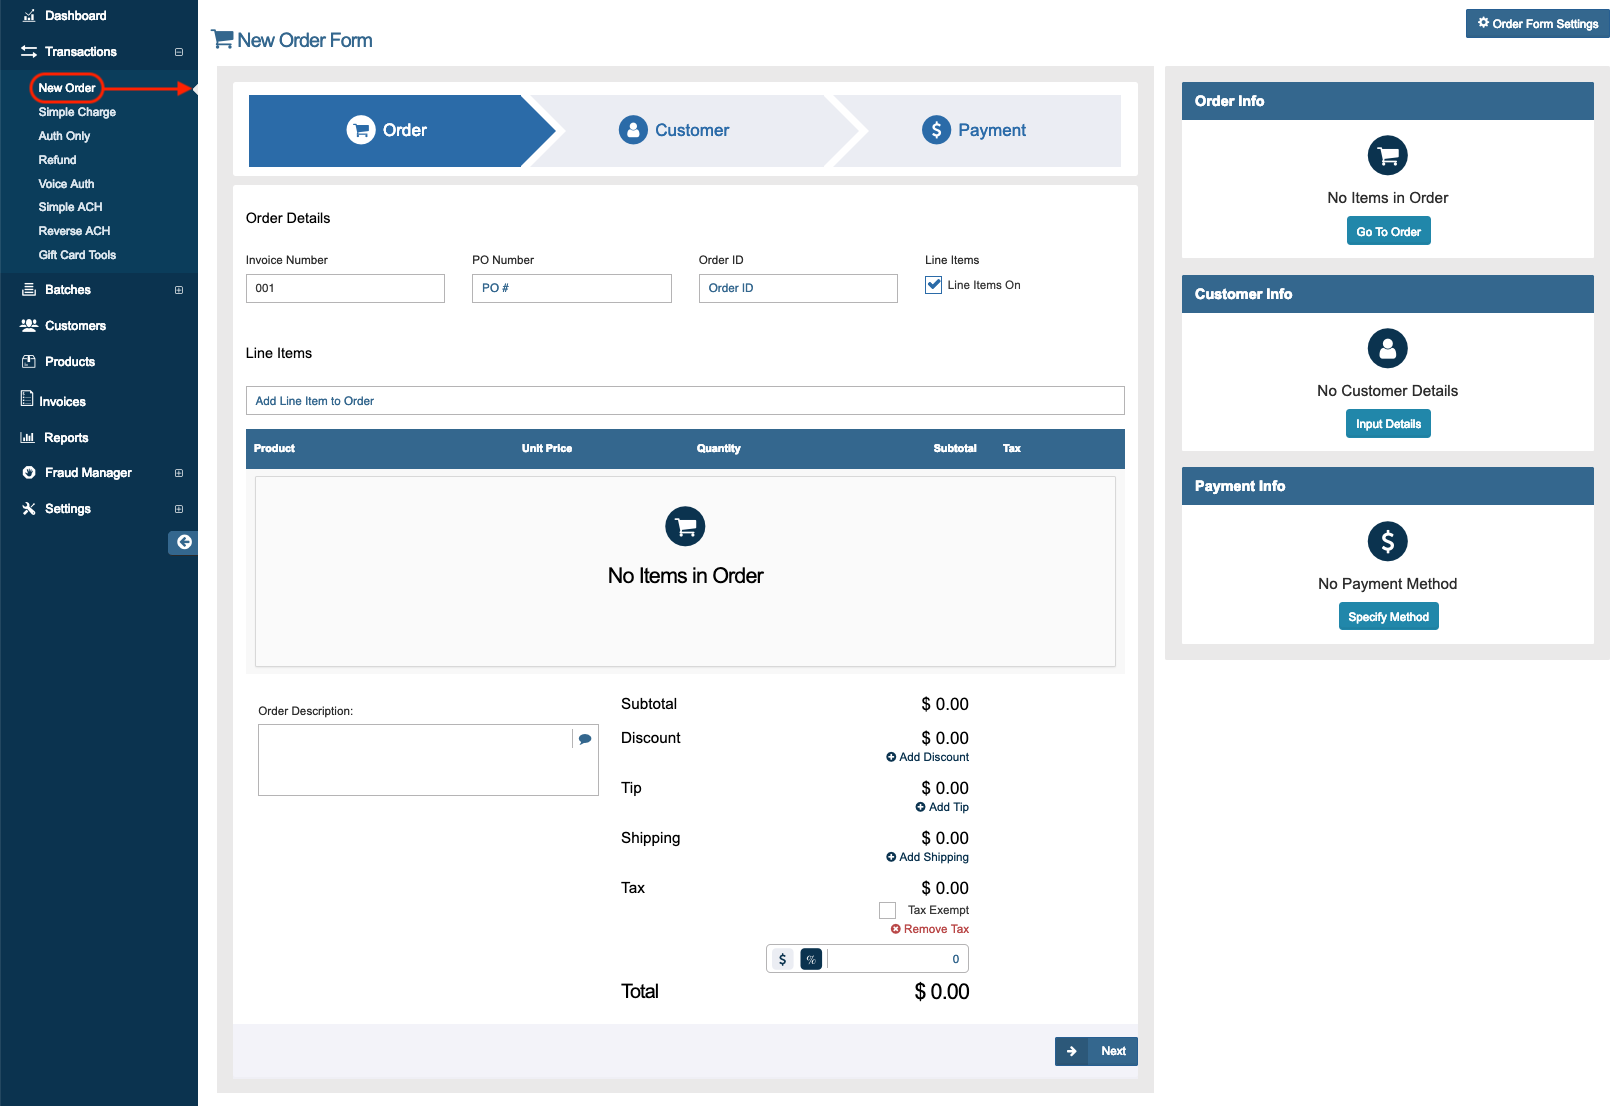
To access the New Order Form, click ‘Transactions’ on the side menu bar from your Dashboard then select ‘New Order’ on the drop down menu. See image below:
Order
Fill in the Invoice Number, PO Number, Order ID, and the Line Items fields, if desired. These fields are optional. You can customize these fields by clicking 'Order Form Settings' located on the top hand right side of the page.
Invoice Customization
Once you click 'Order Form Settings', a pop up window will appear.
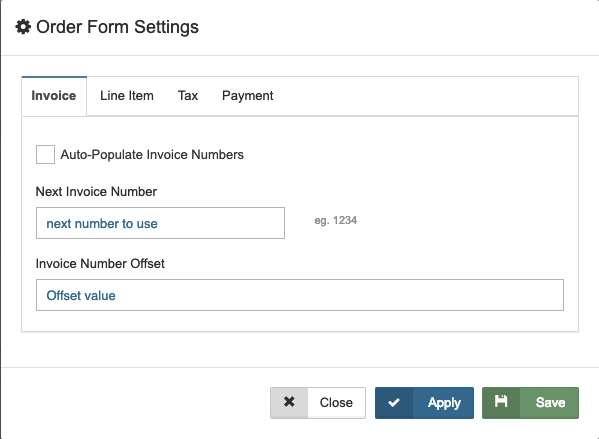
To automatically generate a new ‘Invoice Number’, check the ‘Auto-Populate Invoice Numbers’ box. Next, enter the desired first invoice number in the ‘Next Invoice Number’ field. Then, enter the desired interval between invoices in the ‘Invoice Number Offset’ field.
For example: If you enter ‘100’ in the ‘Next Invoice Number’ field and ‘5’ in the ‘Invoice Number Offset’ field, the first invoice number would be 100, the second 105, the third 110, and so on.
Click 'Save' to apply the setting to the order form
Adding Line Items
Line Items allows you to add products to the new order from your Product Database.
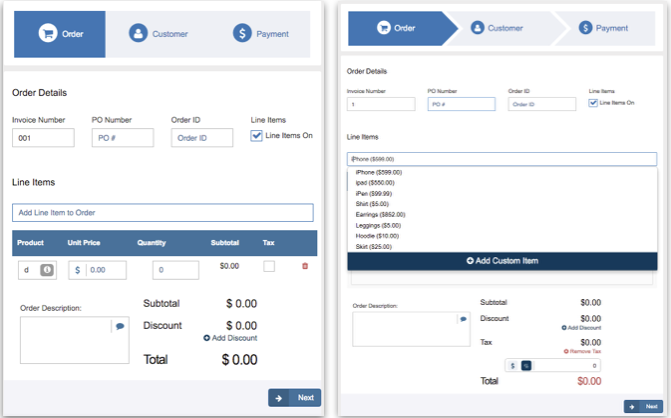
To add an item, type the name of the product or the SKU in the ‘Line Items’ field. A drop down menu will appear with the items that match the criteria entered. Click the desired item and adjust the ‘Unit Price’ and 'Quantity' field as needed.
You may also add a custom item when a product is not in your database yet. To add a custom item, click on the 'Line Items' field and click 'Add Custom Item'.
Enter in the product name, Unit Price, Quantity, and Order Description. Check the Tax box if the item is taxable. Repeat until all desired items are added, then click 'Next' to continue.
Add Discount, Tip, Shipping, and Tax
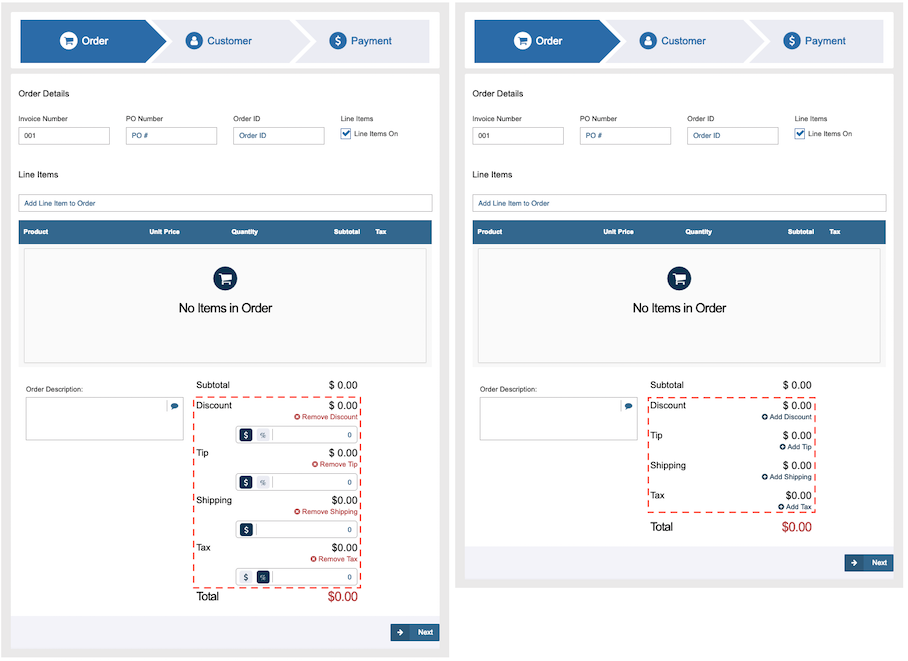
To add a discount to the new order, click on 'Add Discount' then enter the discount in percentage or in dollar amount in the field provided. To remove the discount, click on 'Remove Discount'.
To add tip to the new order, click on 'Add Tip' then enter the tip in dollar amount or in percentage in the field provided. To remove tip, click on 'Remove Tip'.
To add shipping charges to the new order, click on 'Add Shipping' then enter the dollar amount. To remove shipping charges, click on 'Remove Shipping'.
To add tax to the new order, click on 'Add Tax' then enter the tax in dollar amount or in percentage in the field provided. To remove tax, click on 'Remove Tax'.
Tax Exempt
To mark a new order transaction as tax exempt, click on the tax exempt checkbox and this will remove the tax amount from the order.

Customer
If your customer is a returning customer or already in the database, you can search their name or Customer ID number on the ‘Search’ field. A drop down menu with customers matching the criteria entered will appear. Select the correct customer.
For new customers, enter their information in the desired fields.
To save the customer’s information for future transactions, click the ‘Save the customer and the provided details to the customer database’ box.
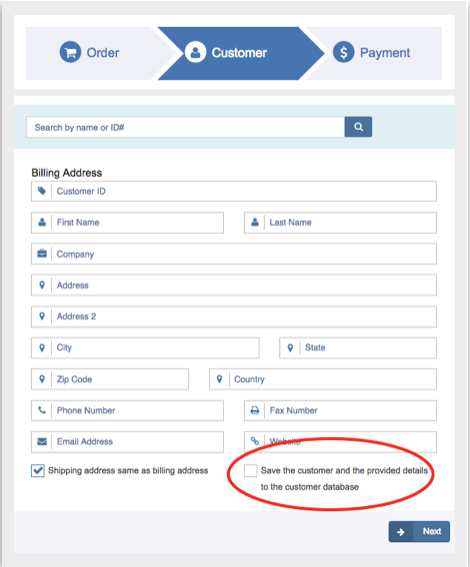
Click 'Next' when done to continue on to Step 3.
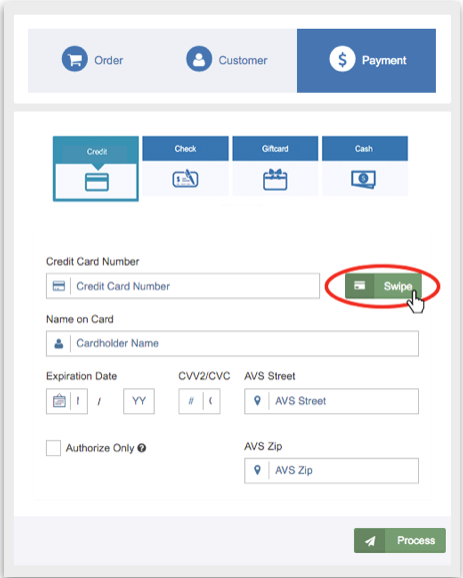
Payment
Depending on the payment methods you accept, you may have the option to accept Credit, Check, Cash or Gift Cards.
Credit: To process a credit card transaction, you may swipe the customer’s credit card or manually enter the customer’s credit card information. To swipe the customer’s credit card, click the 'Swipe' Button.
Once you click 'Swipe', the ‘Please Swipe’ window will appear.

Swipe the card when prompted. Once you have swipe the card, the customer’s encrypted credit card information will auto-populate in the following fields: 'Credit Card Number', ‘Cardholder Name', and 'Expiration Date’.
When manually entering the customer's credit card information, the 'Credit Card Number' and 'Expiration Date' fields are required. All other fields are optional.
If you would like to process the charge as 'Auth Only', remember to check the ‘Authorize Only’ box. This charge will go to your Queued Transactions. (See page 8 for Auth Only Transactions).
Please Note: If a customer is a returning customer and you have their payment method saved, a Customer Payment icon will be available to process the transaction.
Check: To process a check transaction, enter the 'Name on Check', 'Routing Number', 'Account Number’ and 'Check Number'. All the other fields are optional.
Gift Card: To process a gift card transaction, enter the gift card number.
Cash: To process a cash transaction, enter the ‘Amount Tendered’. The amount tendered must be greater than or equal to the total amount of the order. The customer’s ‘Change Due’ will automatically be calculated for you.
## Signature Capture
When Processing with an MP200L you can enable the capture signature option. Click here for more details.
Result
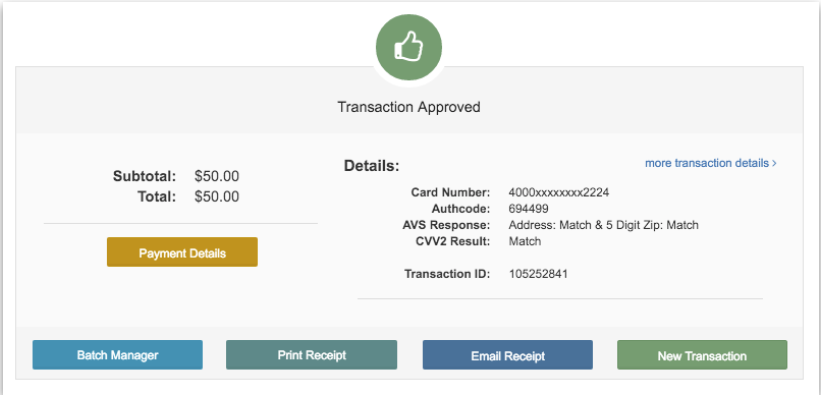
Once all desired fields have been entered, click 'Process'. A pop-up window will appear with one of three responses: Transaction Approved', 'Transaction Declined’, or 'Error'.
The Transaction Approved window gives you a link to the following options: Payment Details, Batch Manager, Print Receipt, Email Receipt, and New Transaction. See image below:
If your transaction is declined, a pop up window will appear giving you the ‘Reason’ for the decline and the ‘Error Code’ of the transaction. The Transaction Declined window gives you a link to the following options: Return to Transaction, Batch Manager, Print Receipt, Email Receipt, and New Transaction. See image below:
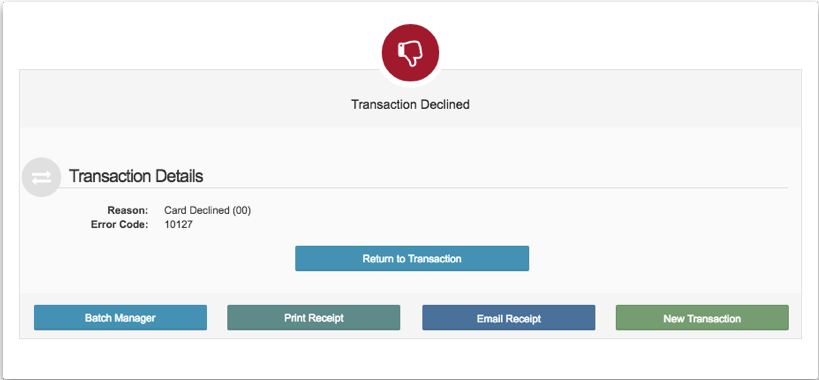
To double-check if you have entered the correct credit card information, or to re-swipe the customer’s credit card, click the 'Return to Transaction' button.