Castles Vega3000
- Certification: See Certified Platforms List
- Supports Swipe
- Supports EMV
- Supports Contactless
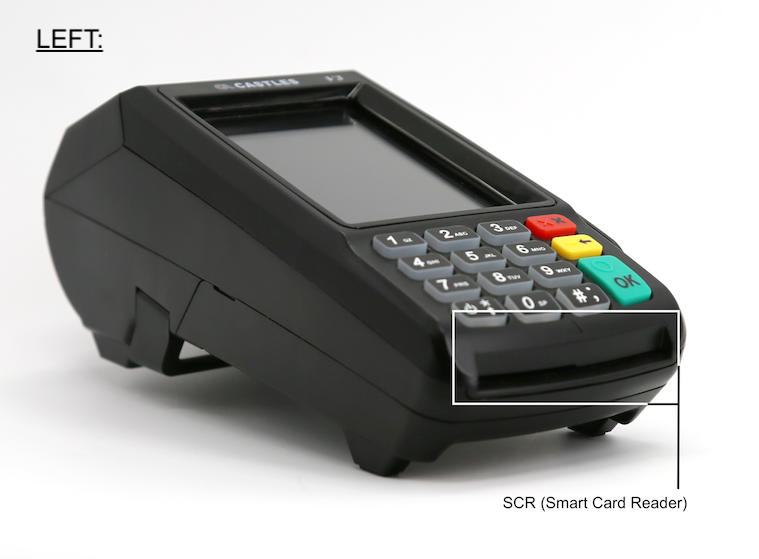
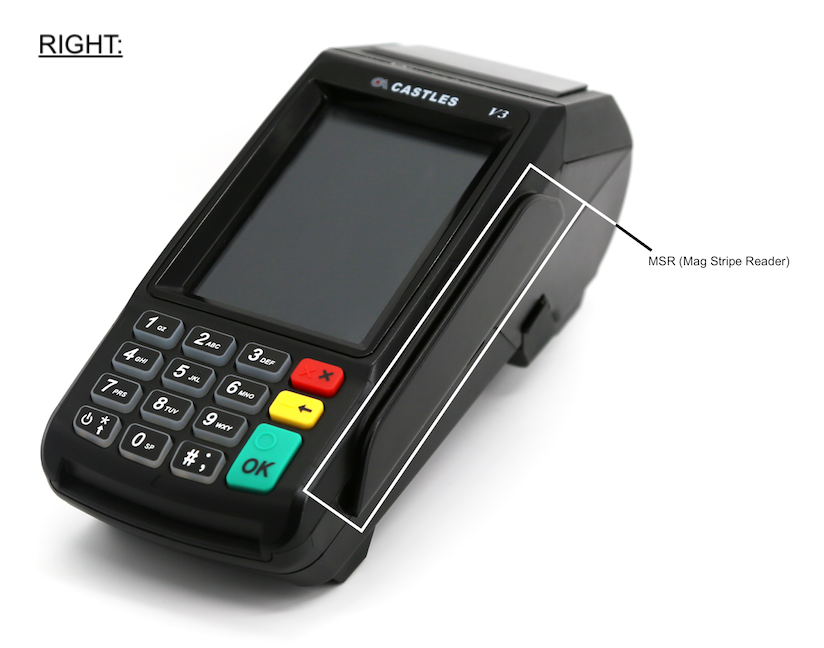
Anatomy of the Vega3000

Pairing Device (Payment Engine)
WiFi
- On the V3 device press and hold the 9 button until you hear the second beep sound.
- You will then be shown a list of available Wi-Fi networks that are in range of the V3.
- Scroll to the network that you want to connect to and press the green key again.
- The device will then prompt you for the password for that network. Use the keys to enter letters and numbers by pressing the key repeatedly to scroll through the available characters for that key.
- When completed, give the device around thirty seconds to connect with the Wi-Fi network. The Wi-Fi indicator will change from
 to showing
  .
.
Ethernet
- Connect the ethernet cable to the LAN port on the back of the device.
- The network indicator will change from
 to showing
  .
.
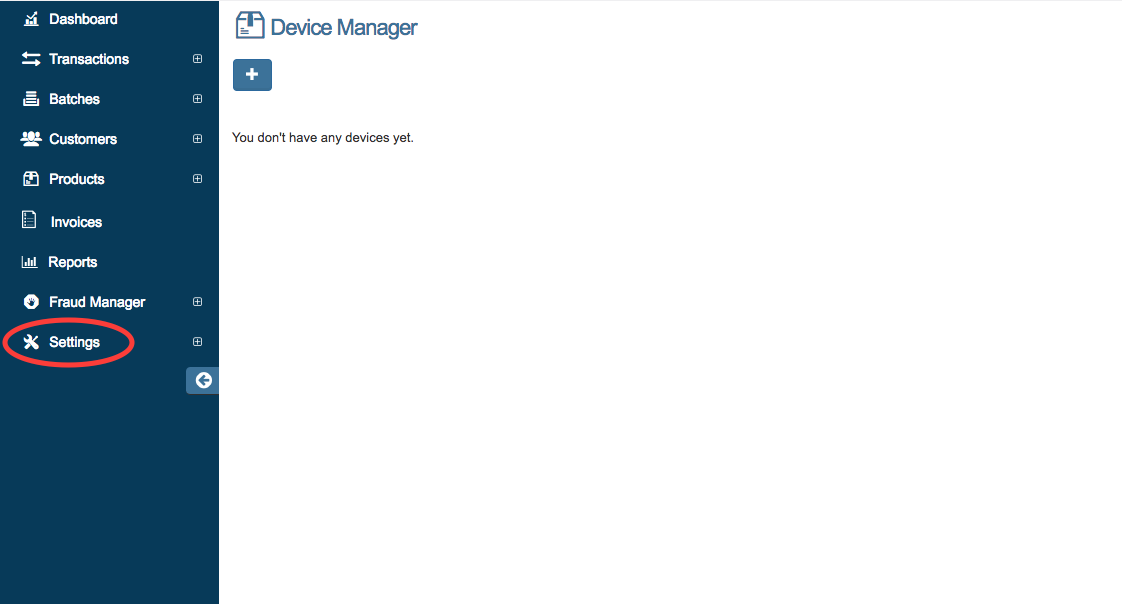
1.) To access the Device Manager, click on ‘Settings’ from your side menu bar then select ‘Device Manager’ on the drop down menu.
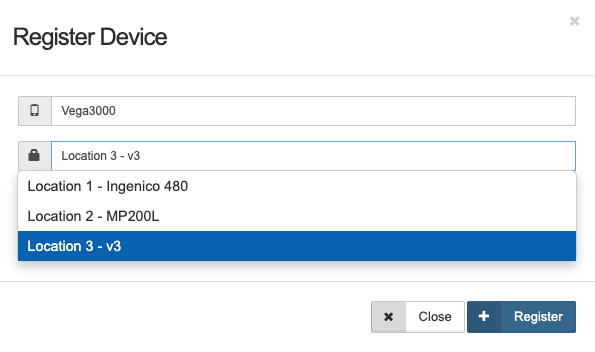
2.) A source key must be added first to connect your device (CASTLES VEGA3000). Go to ‘Settings’ from your side menu bar and then select ‘API Keys’ on the drop down menu. Click on 'Add API Key' to add a new source key.
3.) After a source key has been generated, return to the Device Manager section under Settings. Click on the 'Add' button to add a new Device. The following screen will appear to register device:
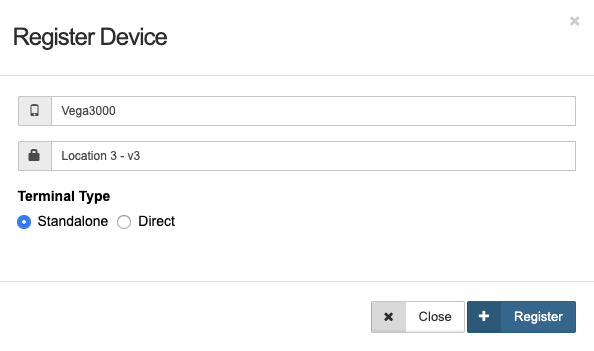
4.) Enter the Device’s Name, select the Source Key from the drop down menu as shown below, and select the Terminal Type as Standalone:
Once the Device Name, Source Key, and Terminal Type have been selected, click on 'Register'. The Merchant Console will then generate a pairing code to pair your device to the Merchant Console.

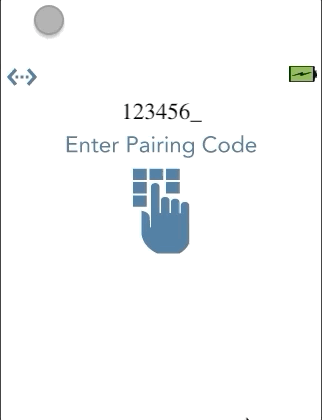
The CASTLES VEGA3000 device will then ask you to enter the pairing code (shown in the Merchant Console):
5.) Once the pairing code has been entered, your device should be connected. In the Device Manager, the green icon in the top right of the box indicates that the device is connected.
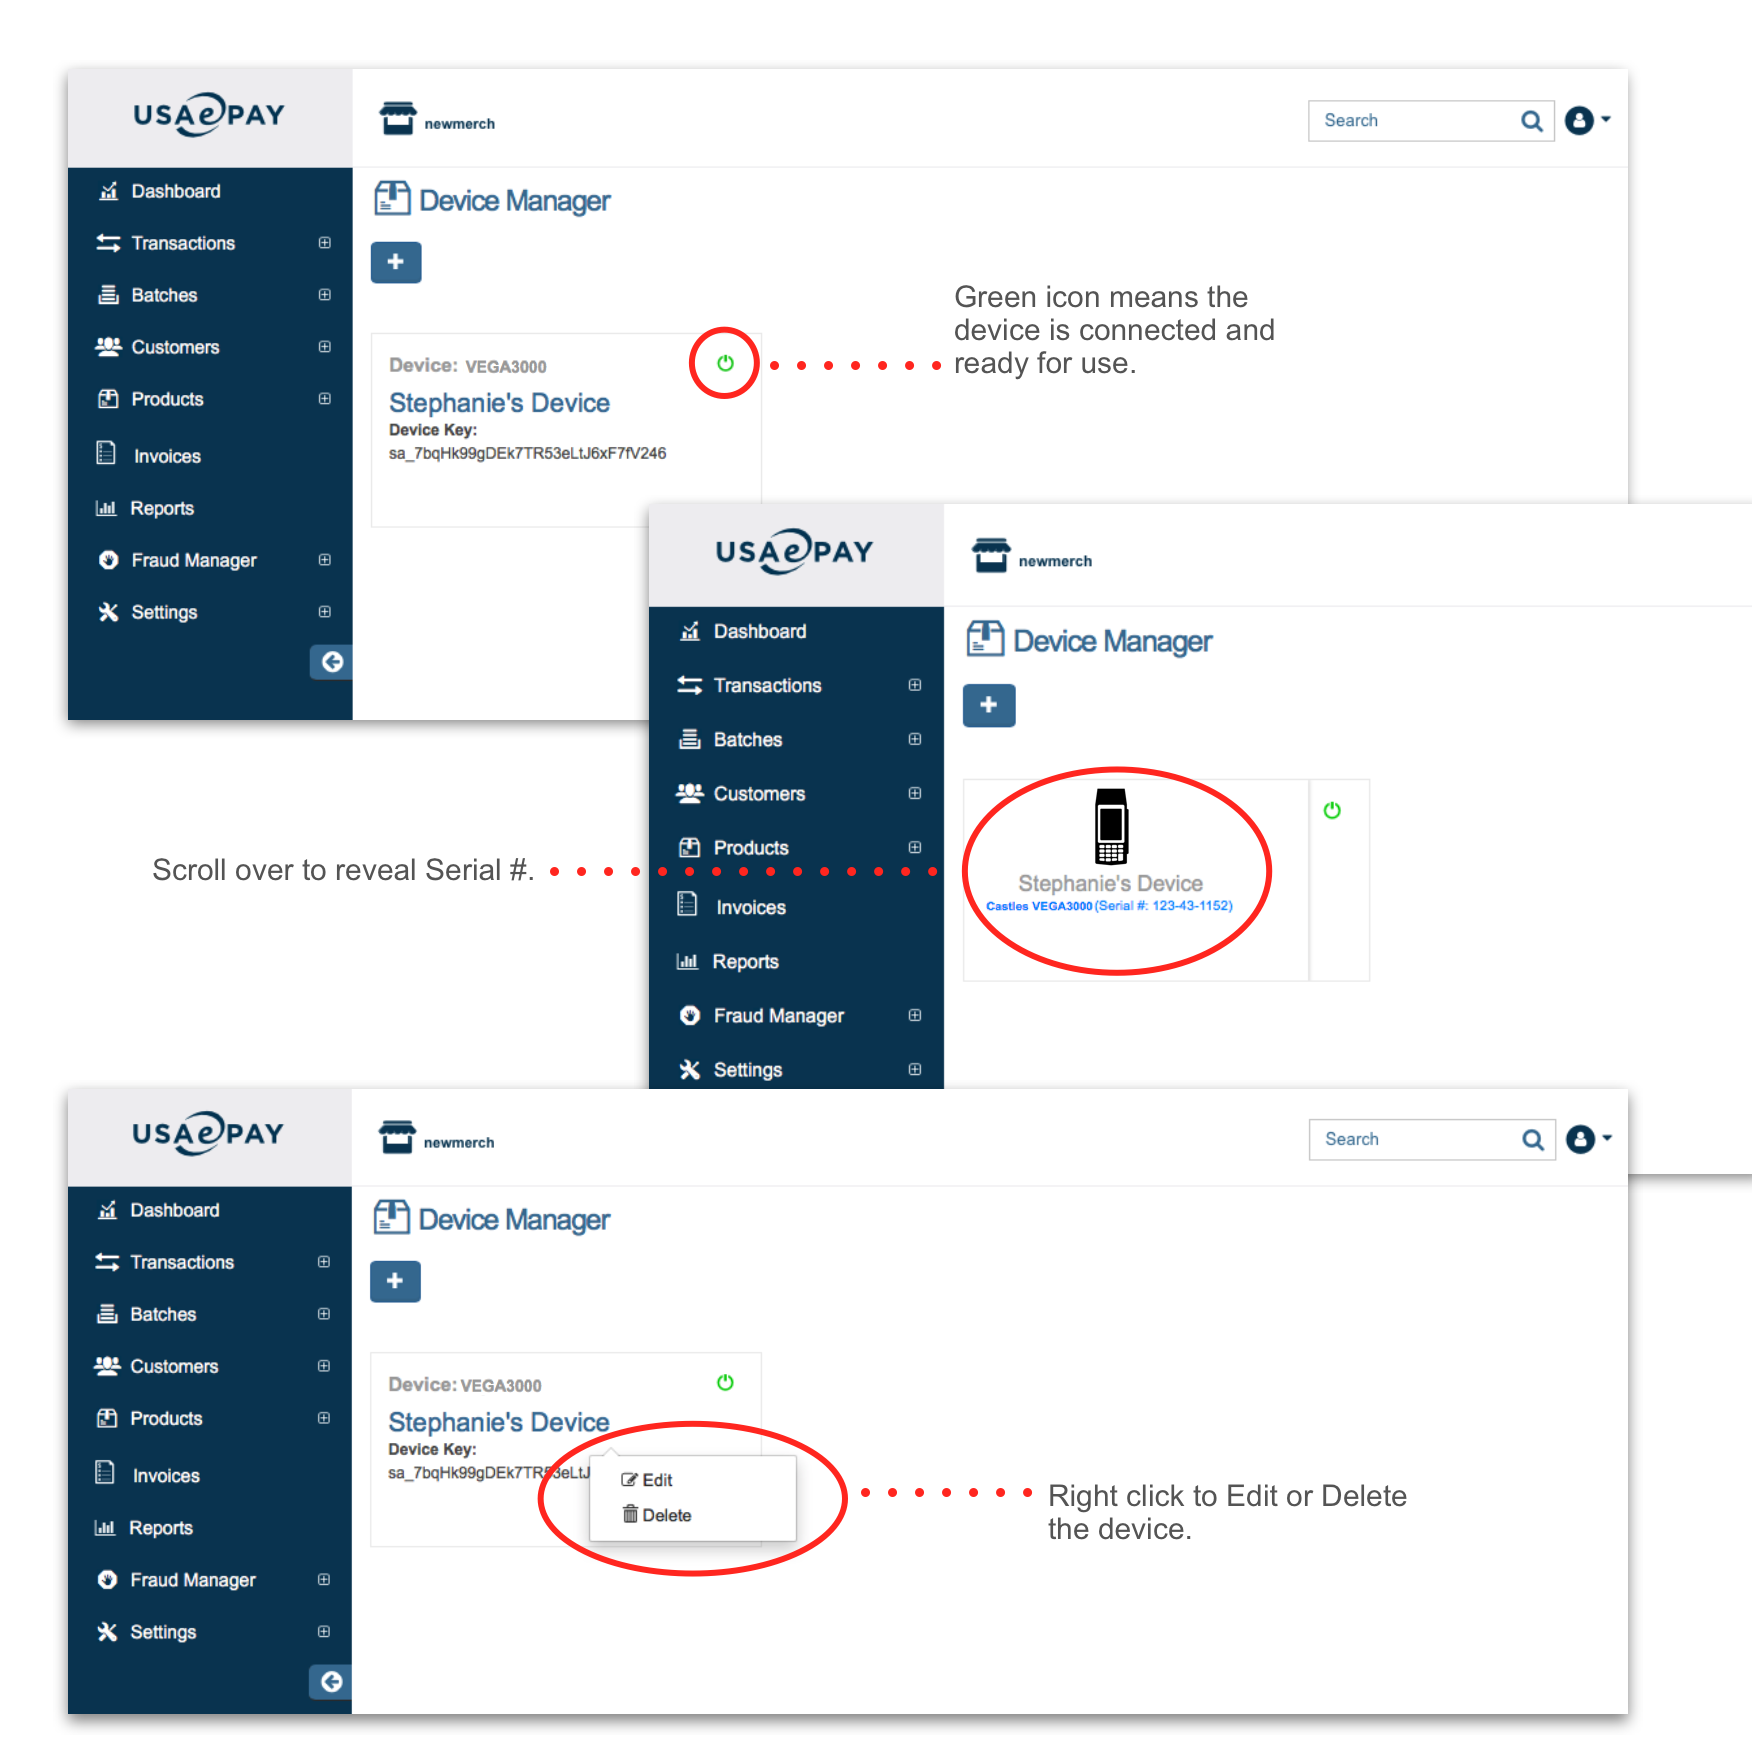
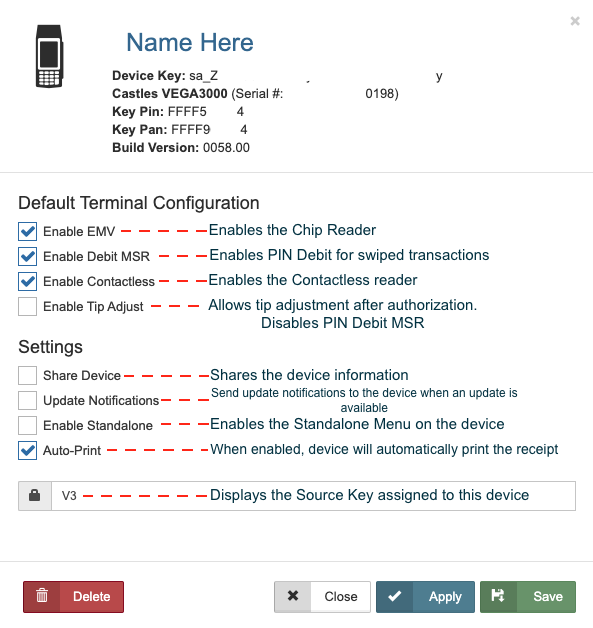
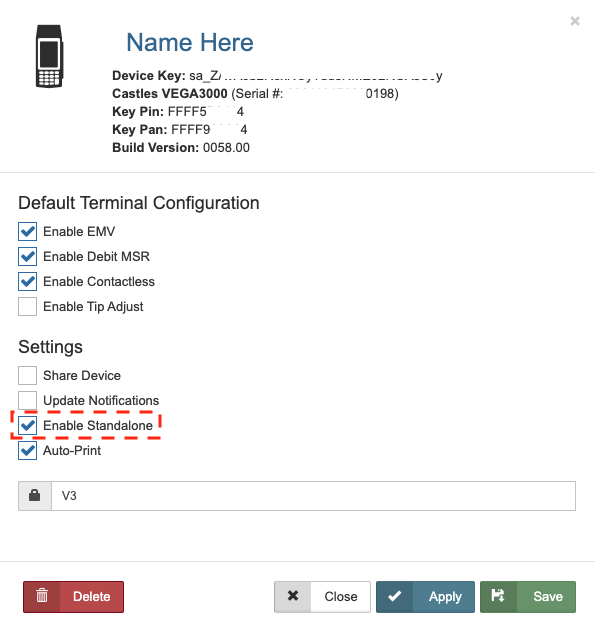
6.) Device Options: Click on the device to view the device settings. The following page with the device information and options will appear:
7.) Now that a device is connected to your Merchant Console, the Simple Charge option will appear under the ‘Transactions’ section of the Console.
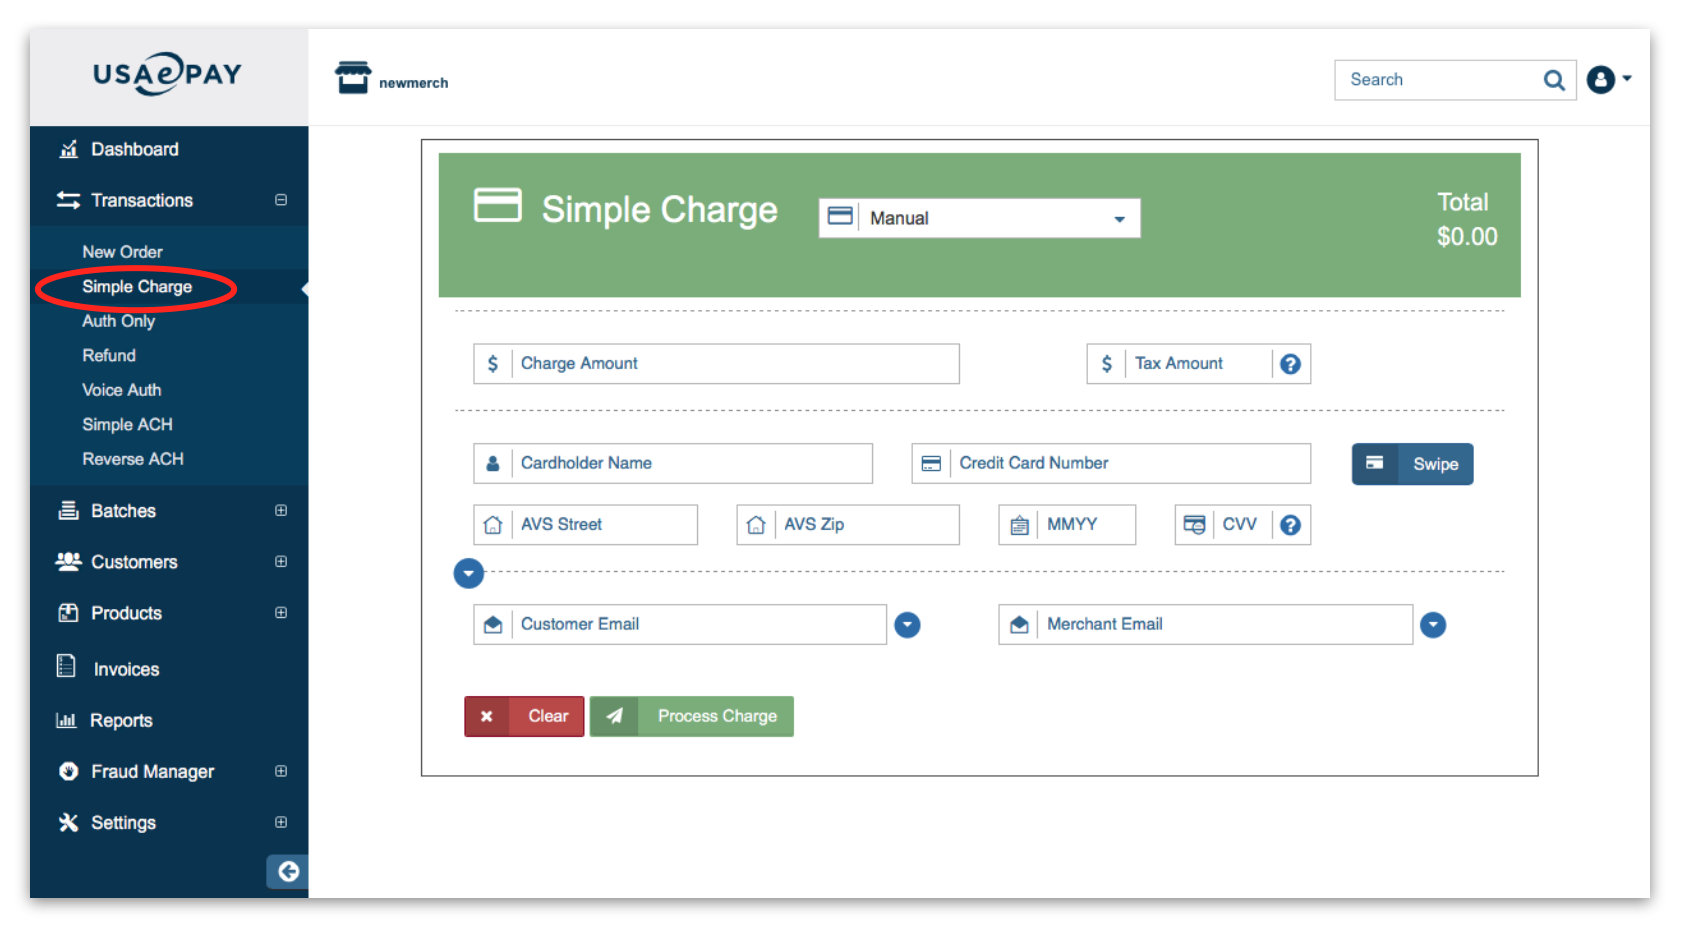
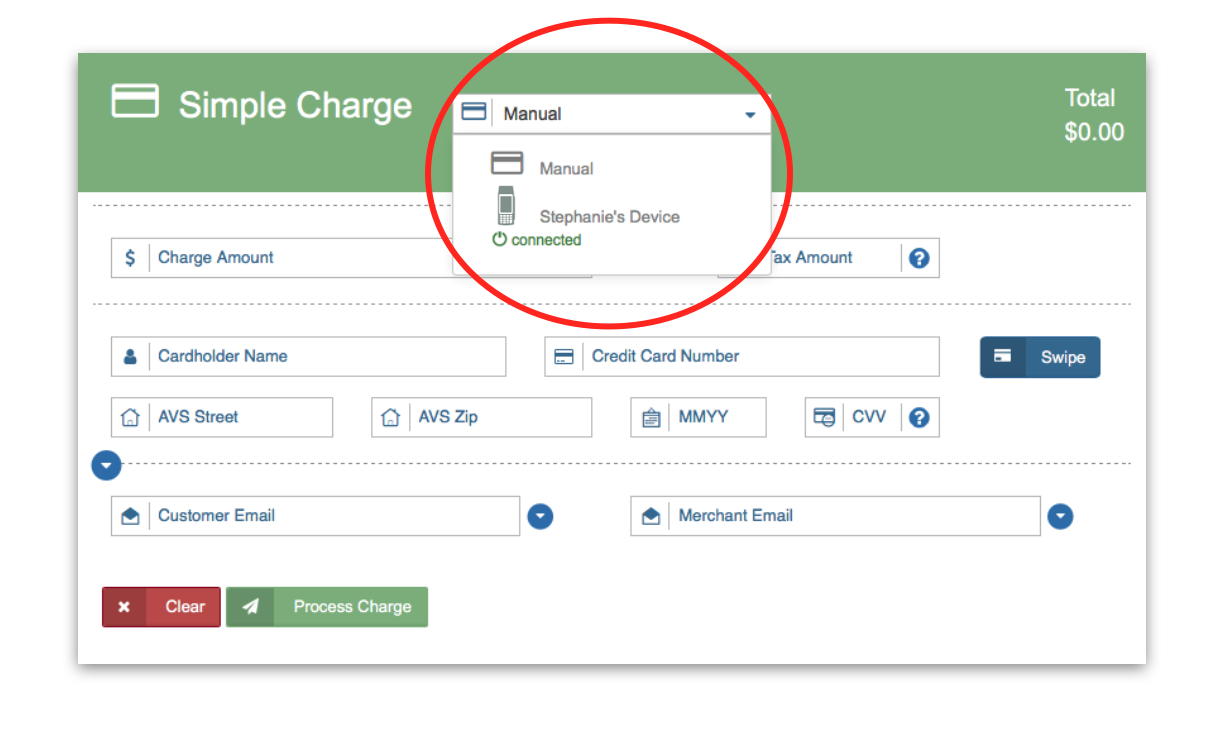
When you click on Simple Charge in the side menu, you can either enter the information manually or use your device to process the card. Click on "Manual" to reveal the drop down menu and select from the devices connected.
After all information has been entered, click on 'Process Charge' to process the transaction.
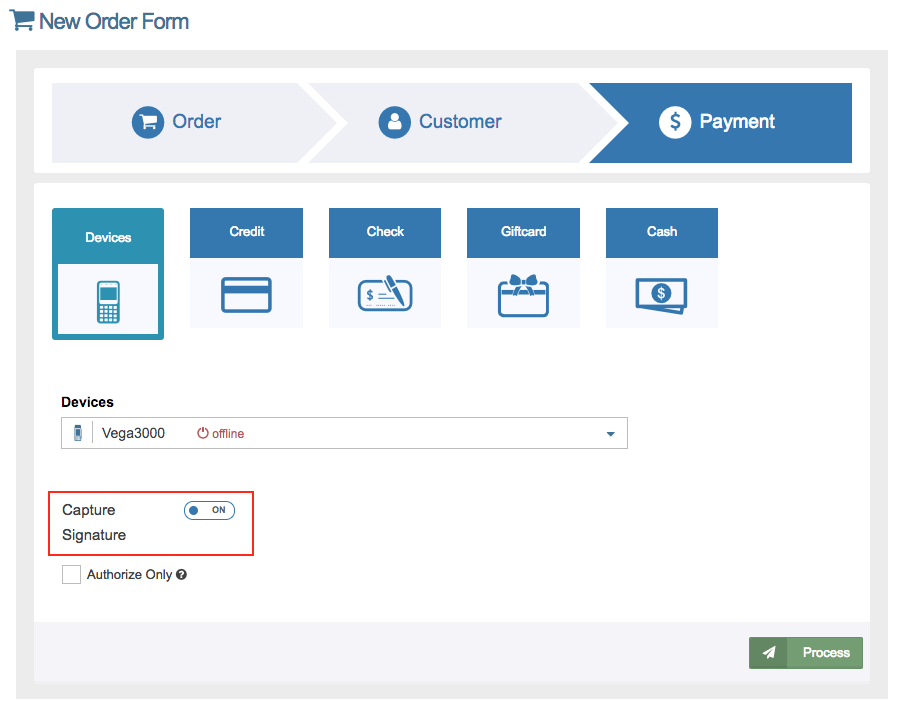
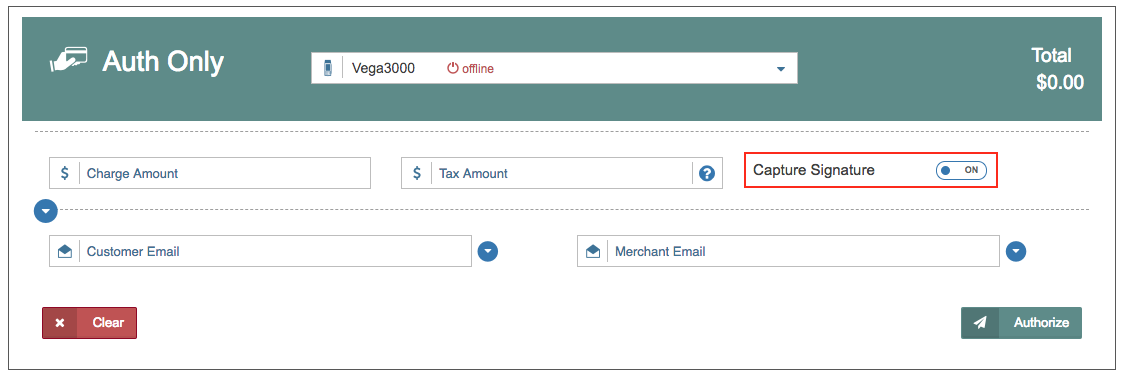
Signature Capture
Signature capture will be possible on every Vega3000 model with the built-in touchscreen. This option will appear on New Order, Simple Charge, and Auth Only screens in the console, as well as in Standalone Mode.
New Order:
Simple Charge:

Auth Only:
Signature Screen
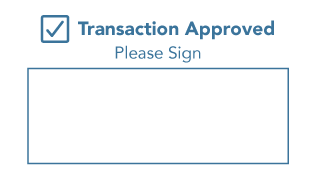
This is what the signature screen will look like on the Vega3000. After the customer is finished signing, press the green OK button to confirm the transaction. You may also skip the signature capture on the device by pressing the red cancel button on the device.
The signature will then appear in the Transaction Details.
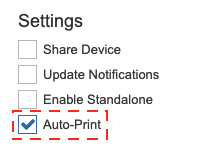
Standalone Mode
In order to activate Standalone Mode on your Vega3000 device, you will need to check "Enable Standalone" and click "Apply" or "Save". On your device, you will need to enter the Main Menu by holding down the '9' key until you hear a second beep. Once in the Main Menu, you can simply press the cancel button to enter the Standalone Menu, as shown below.
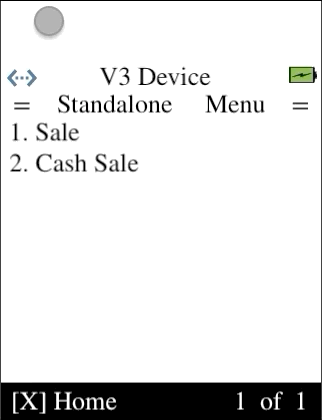
This is the Standalone Menu. Here you will be able to complete an entire transaction from start to finish directly on the device.
- Option 1 allows you to start a credit card transaction. Once the transaction is completed, the device will prompt for signature.
- Option 2 allows you to record a cash transaction.
- These transactions will be reported in your Point of Sale report on the console.
The "Home" option at the bottom of the screen can be accessed by pressing the cancel button. This will take you to the Main Menu of the device while in Standalone Mode.
Printer
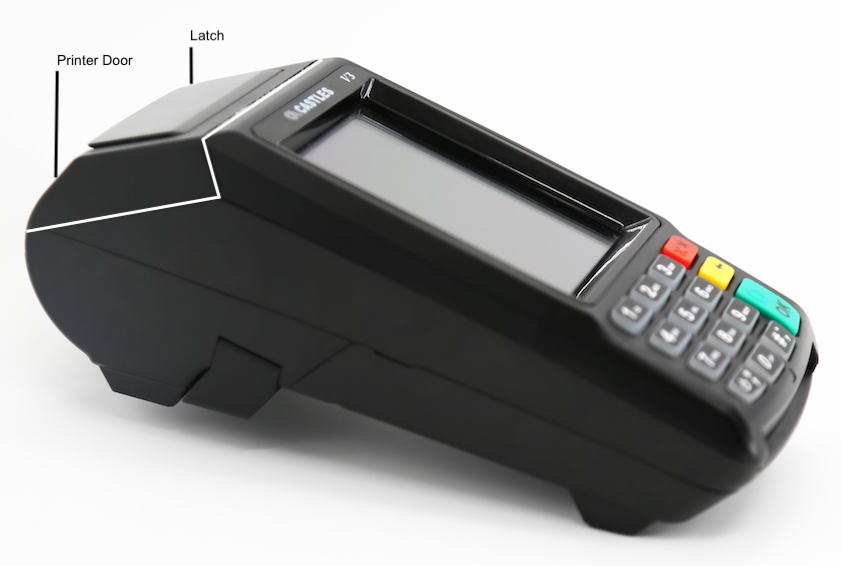
The built-in printer at the top of the device is capable of printing receipts for every transaction.
- The printer can hold a 50 ft paper roll with a width of 2 1/4 inches.
- Pulling up on the latch will open the printer door and push the door back down to close.
- The paper will feed through the seam where the printer door closes.
- There is no feed button on the device.
- The printer can also be disabled via the Device Manager.