Custom Reports
Custom Reports are a powerful tool which allow you to create unique reports based on the information that's most important to your business. All custom reports can also be edited later if needed.
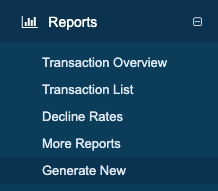
To get started on creating your report, locate the section found under 'Reports' in the sidebar, then in 'Generate New' in the dropdown.
A page will open outlining the five (5) components of an automated report:
On the righthand side of the page, you will also see the "Report Preview" section. This is an outline of the information you enter into each component. When you start a brand new custom report, the "Report Preview" section will be blank as shown below.
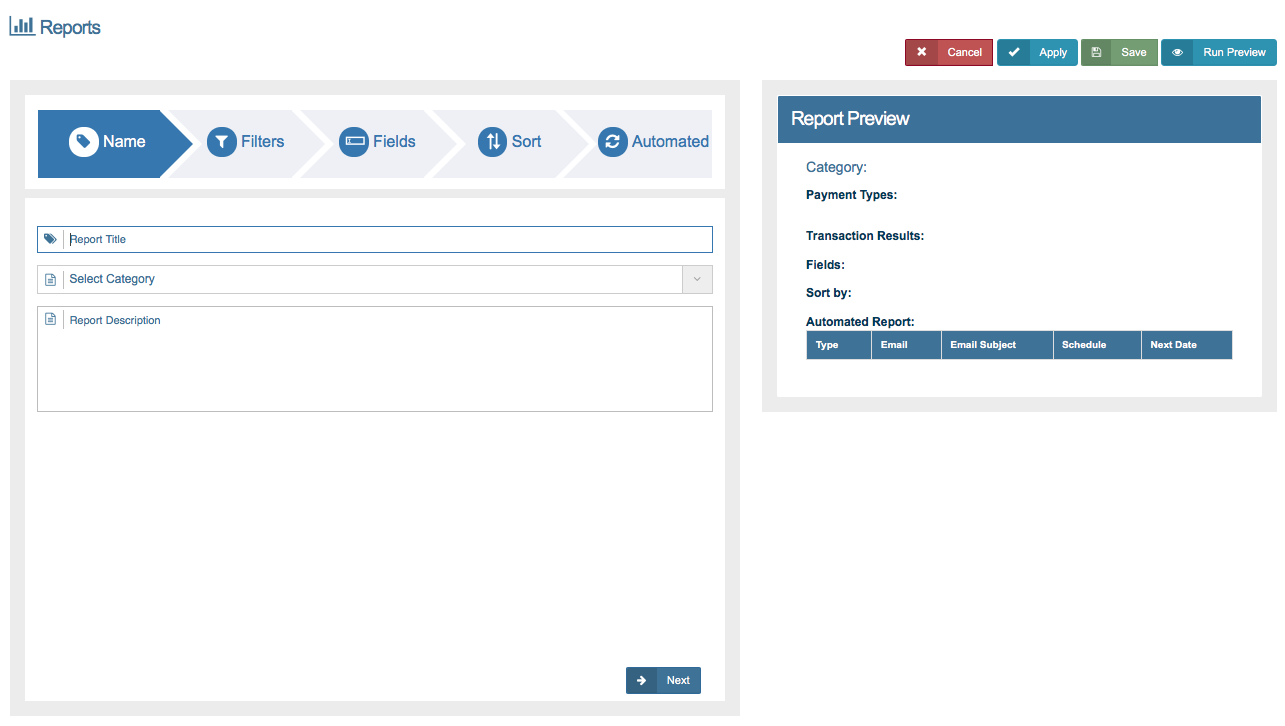
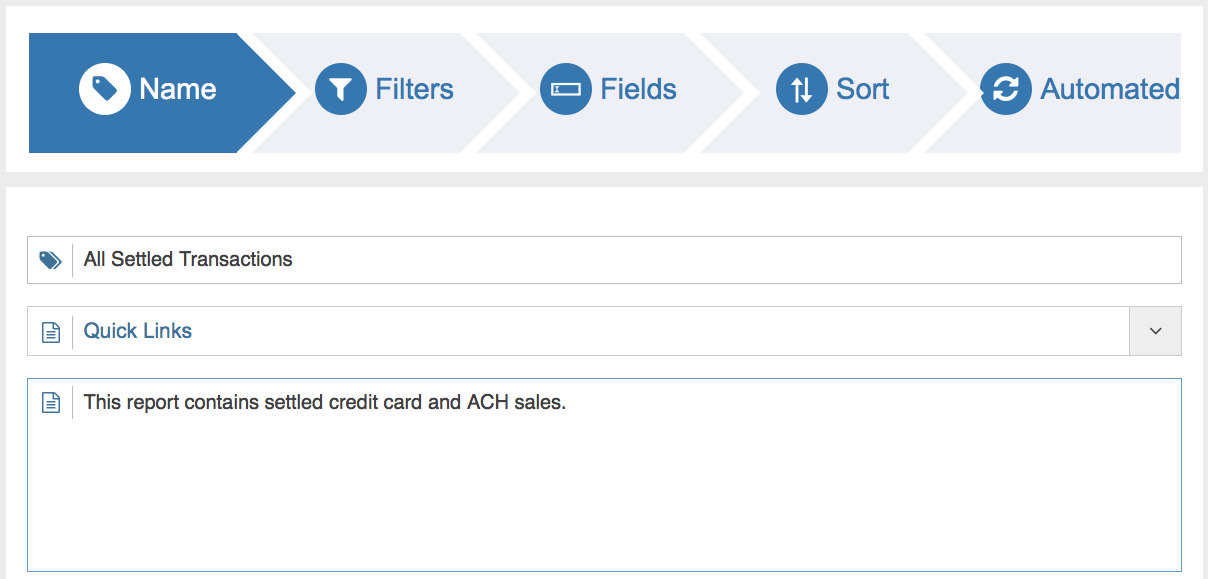
Name
The name is the first component of the report. In this section you will enter:
- Report Title: Name the report. This will be the title listed on the reports homepage. This field is required
- Category: Click on this field to see a drop-down menu containing your custom report categories. If you would like to create an additional category, click here for further instructions. This field is required.
- Description: A description of your custom report. This field is NOT required and is for your reference only.
Once complete, click  to continue.
Filters
The filters section allows you to filter by transaction result, transaction type, advanced filters, or a combination of all three.
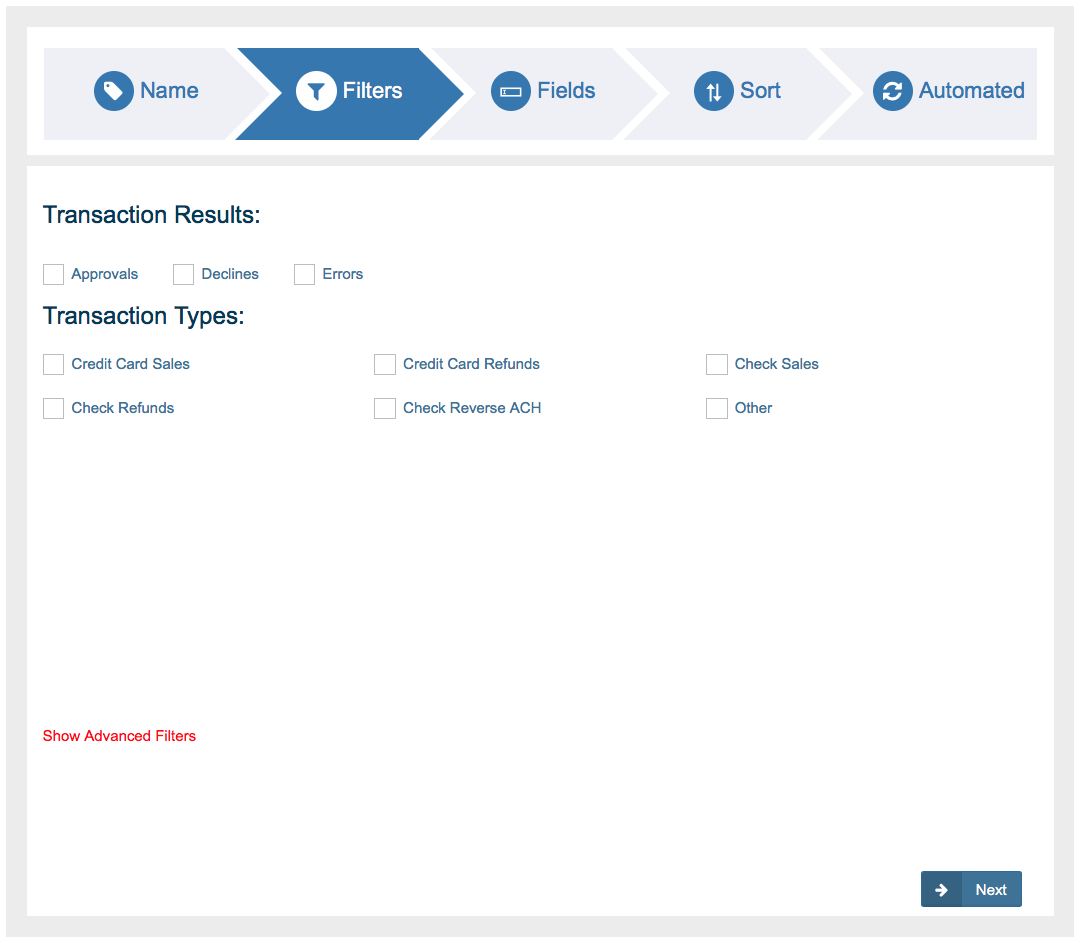
Transaction Results & Transaction Types
Check the boxes of the Transaction Results you would like to include in the report. Possible results are: Approvals, Declines, or Errors. For a more detailed description of of these transaction results, click here.
Next, check the boxes for the Transaction Types you would like to include in the report. Once you check the box, for a certain transaction type, smaller designations within that transaction type will appear.
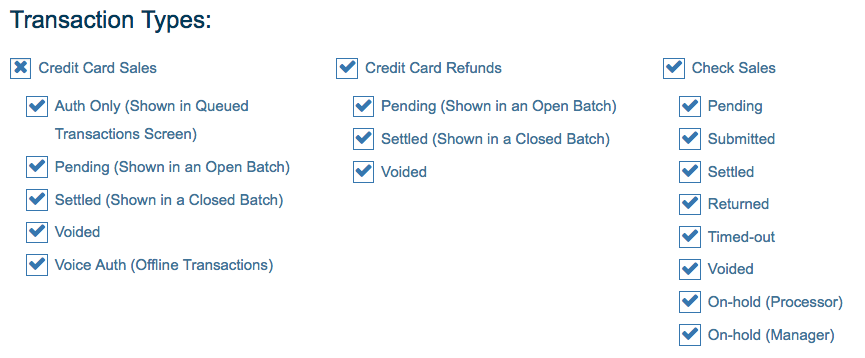
Check or uncheck to add or remove certain transactions from the report. For example, if you only want to see settled credit card sales in the report, you would check "Credit Card Sales" and then uncheck all options except for "Settled (Shown in a Closed Batch)"
Possible transaction types are:
- Credit Card Sales
- Auth Only: This transaction has not been settled and is not currently in the open batch. It may have been processed as Auth Only or queued before the batch was settled.
- Pending: A transaction that has NOT been settled/finalized with the customer's bank. This transaction is in an open batch OR has received an error or decline.
- Settled: A transaction that has been settled/finalized with the customer's bank. This batch containing this transaction has been closed.
- Voided: The transaction was cancelled before it settled.
- Voice Auth: Transactions processed through the Voice Auth screen.
- Credit Card Refunds
- Pending: A transaction that has NOT been settled/finalized with the customer's bank. This transaction is in an open batch OR has received an error or decline.
- Settled: A transaction that has been settled/finalized with the customer's bank. This batch containing this transaction has been closed.
- Voided: The transaction was cancelled before it settled.
- Check Sales
- Pending: The transaction has not been sent to the bank yet.
- Submitted: The transaction has been sent to the bank. The transaction can no longer be voided.
- Settled: The transaction has been processed and cleared.
- Returned: The transaction has been returned/declined by the bank (usually due to insufficient funds).
- Timed-out: No update has been received from the processor in 5 days.
- Voided: The transaction has been cancelled before the customer's bank received it.
- On Hold (Processor): The transaction is being held by the processor for review.
- On Hold (Manager): The transaction has been placed on hold pending for a manager’s approval.
- Check Refunds - Options within Check Refunds are the same as those listed under Check Sales.
- Check Reverse ACH - Options within Reverse ACH are the same as those listed under Check Sales.
- Other
- Cash Sale: Cash sale transaction processed through a point of sale.
- Cash Refund: Cash refund processed through a point of sale.
- Credit Card Sale (External): A credit card sale that was not processed through the gateway, but was recorded in the gateway for record keeping purposes. For example, and invoice that you have marked as paid
- Credit Card Refund (External) A credit card refund that was not processed through the gateway, but was recorded in the gateway for record keeping purposes.
- Check Sale (External): A check sale that was not processed through the gateway, but was recorded in the gateway for record keeping purposes. For example, and invoice that you have marked as paid
- Check Refund (External): A check refund that was not processed through the gateway, but was recorded in the gateway for record keeping purposes.
- Gift Certificate
- Invoice
- Stored Value
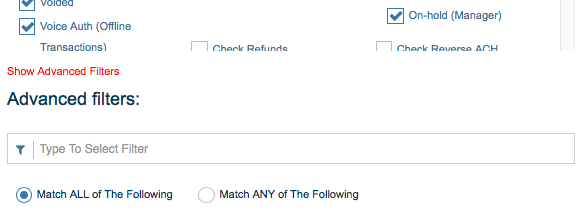
Advanced Filters
To create your own filter, click "Show Advanced Filters" and the advanced filter menu will show. Select "Match ALL of the Following" to only include transactions which match ALL of the advanced filters added to the report. Select "Match ANY of the Following" if you want to include transactions that match at least one of the advanced filters you enter. If only ONE advanced filter is added to the report, the report will be the same either way.
To select your first filter, click into the "Type to Select Filter" field and begin typing the name of the field you would like to filter by. Click here to see a list of the fields that you can filter by. Once you have selected the field, it will be listed in the Advanced Filters section.
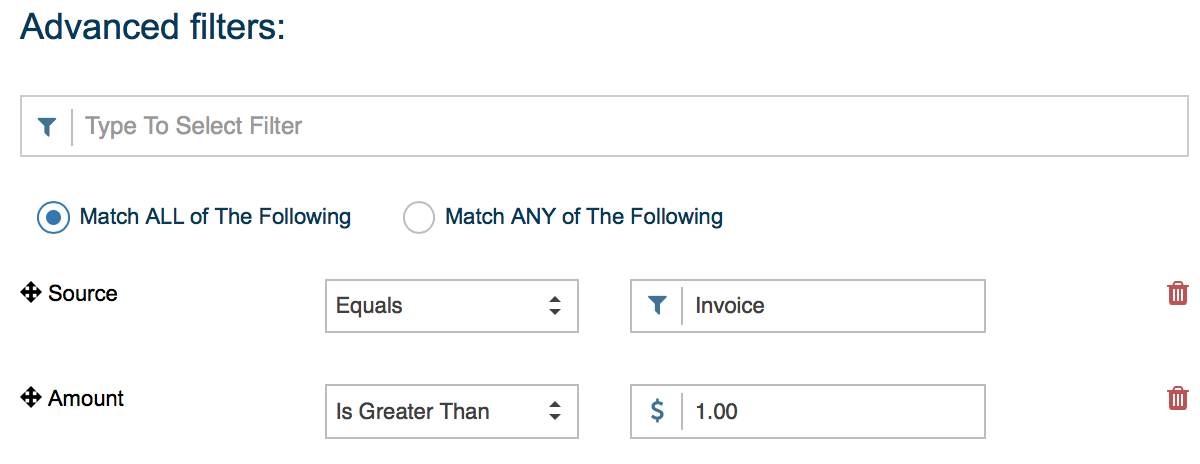
Then choose the filter operator and then the value you would like to filter by. Below are the available filter operators, their definition, and an example of how you might use each:
| Filter Operator | Description | Example |
|---|---|---|
| Equals | Includes only exact matches. | "Source Equals Invoice" will show only transactions processed through the Invoice source. key. |
| Contains | Includes transactions with your search string, but sometimes also include other information. | “Billing Company Contains pro” would find transactions with the Billing Company of Pro Painters, Reciprocity, AND Rent-a-Pro. |
| Is Greater Than | Includes results that are greater than the value entered. | “Amount Is Greater Than 200” returns transactions where the amount field is 200.01 or more. |
| Is Less Than | Includes results that are less than the value entered. | “Amount Is Less Than 200” returns transactions where the amount field ranges from 0 to $199.99. |
| Does Not Equal | Eliminates transactions which are NOT exact matches. | "Source Does NotEqual invoices" will show all transactions not processed through the invoices source key. |
| Starts With | Includes transactions where the field starts with the value, but exact text may not match exactly. | “Billing Company Starts With pro” would find transactions with the Billing Company of Pro Painters, but NOT Reciprocity or Rent-a-Pro. |
| Ends With | Includes transactions where the field ends with the value, but exact text may not match exactly. | “Billing Company Ends With pro” would find transactions with the Billing Company of Rent-a-Pro, but NOT Reciprocity or Pro Painters. |
| In List | Includes transactions that contain the value in field. Usually used for fields that contain an array. | "Product In List Hamburger" would find transactions that had a Hamburger listed as a line item. |
| Not In List | Eliminates transactions that do NOT contain the value in field. Usually used for fields that contain an array. | "Product Not In List Hamburger" would find transactions that did NOT have a Hamburger listed as a line item. |
| Does Not Contain | Eliminates transactions that don’t contain the value you enter. | "Shipping Street Does Not Contain PO Box" will only show transactions that have PO Box in their Shipping Street field. |
Tip: Smart Dates
When creating a filter on the transaction date field, you can use smart dates in addition to the traditional mm/dd/yy format. Some examples of smart dates are:
- -7 days = transactions processed 7 days ago
- last Friday = transactions processed the previous Friday
- -6 months last Friday = the 6 months ago from the previous Friday
- yesterday
All of these dates are calculated when the report is open (NOT when it is created), so that you can create reports such as 'Sales in the Last 2 weeks' that will include transactions from the two weeks prior to when you open the report. In other words, the report will automatically update as time passes.
Tip: Card Type Filter
When creating a filter for the credit card type, be sure to use the Equals filter operator and the following values for each card:
- Amex
- Discover
- Visa
- MasterCard
- DinersClub
- JCB
Enter as many advanced filters as you would like. If you would like to re-order the filters, click the arrow on the left, and drag and drop to reorder the list.

If you would like to delete a filter, click the delete button on the right hand side of the filter:

Once you have added all of your desired filters, click to continue.
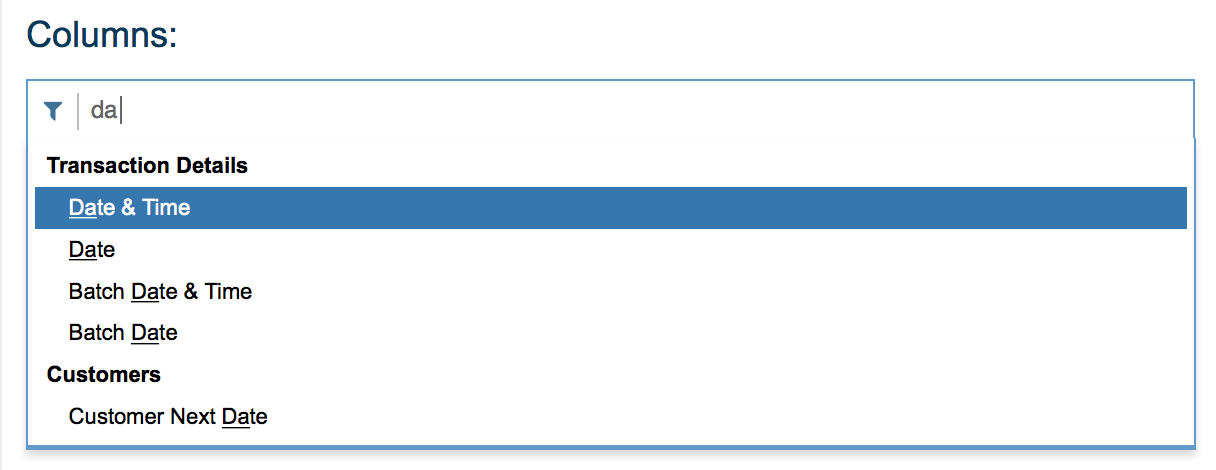
Fields
Start typing the field name in the "Columns" field to search for your desired field (much like in the Advanced Filters section). Click here to see a list of the fields that you can add to the report.
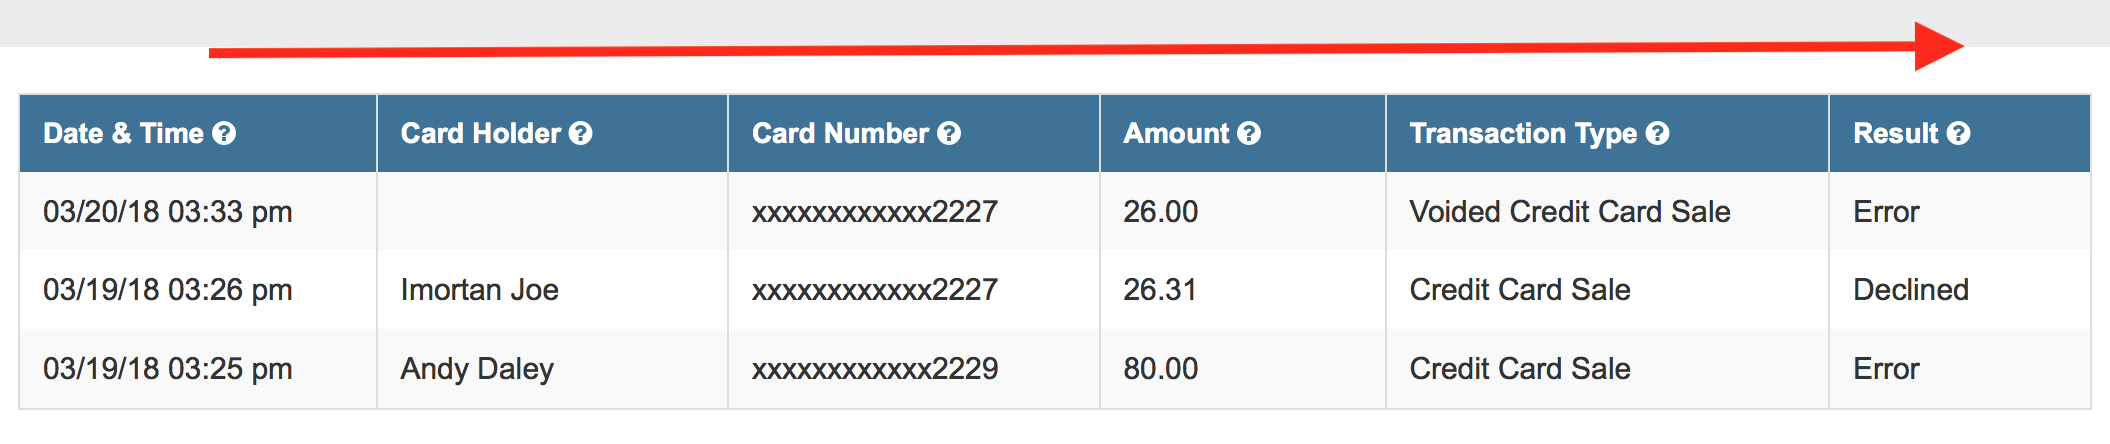
Each of the fields you select will add a column for that field to the report. When you open the report, the fields will be listed left to right starting with the top field in your list. Columns will continue in the order you have listed the fields with the bottom field being furthest to the right.
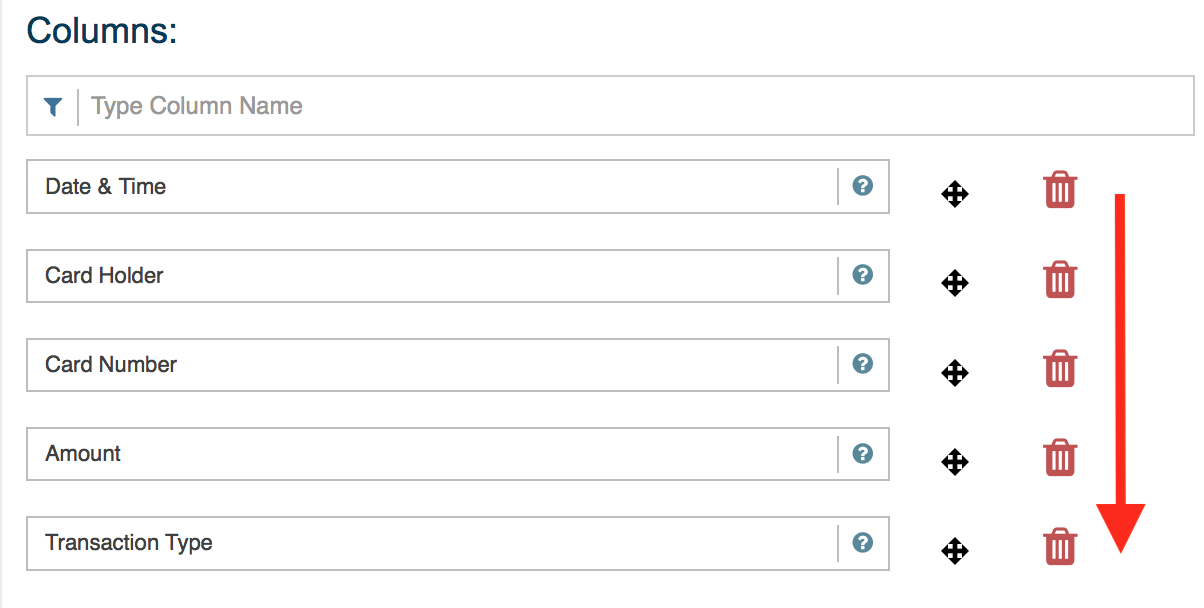
If you would like to reorder the columns, click the arrow icon and drag and drop to reorder the list. 
Click the Delete icon to delete a field from the report. 
Once you have added all of your desired fields, click to continue.
Sort
Once you have decided which fields to display, you can then select the order in which you would like them to appear in your report. To add a field to sort by, start typing the field name and then select it from the list. Click here to see a list of the fields that you can sort by.
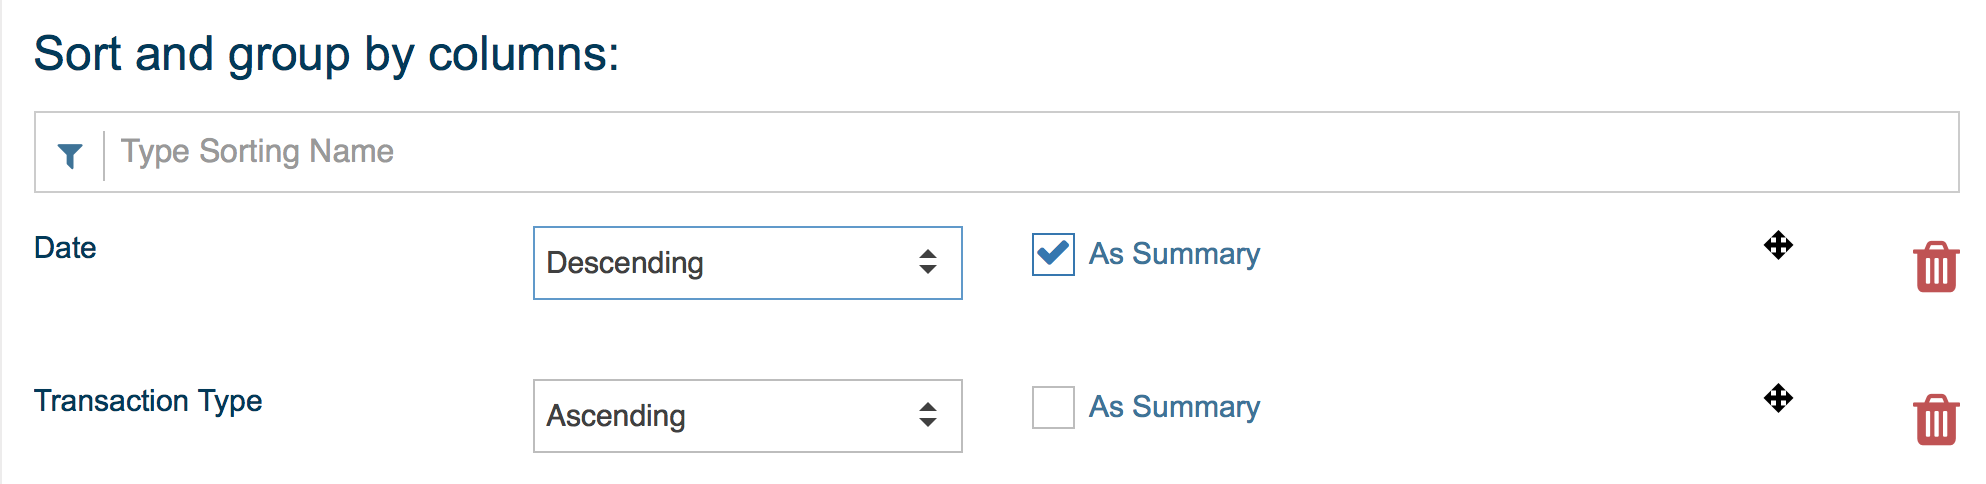
From the drop down menu choose: Ascending or Descending.
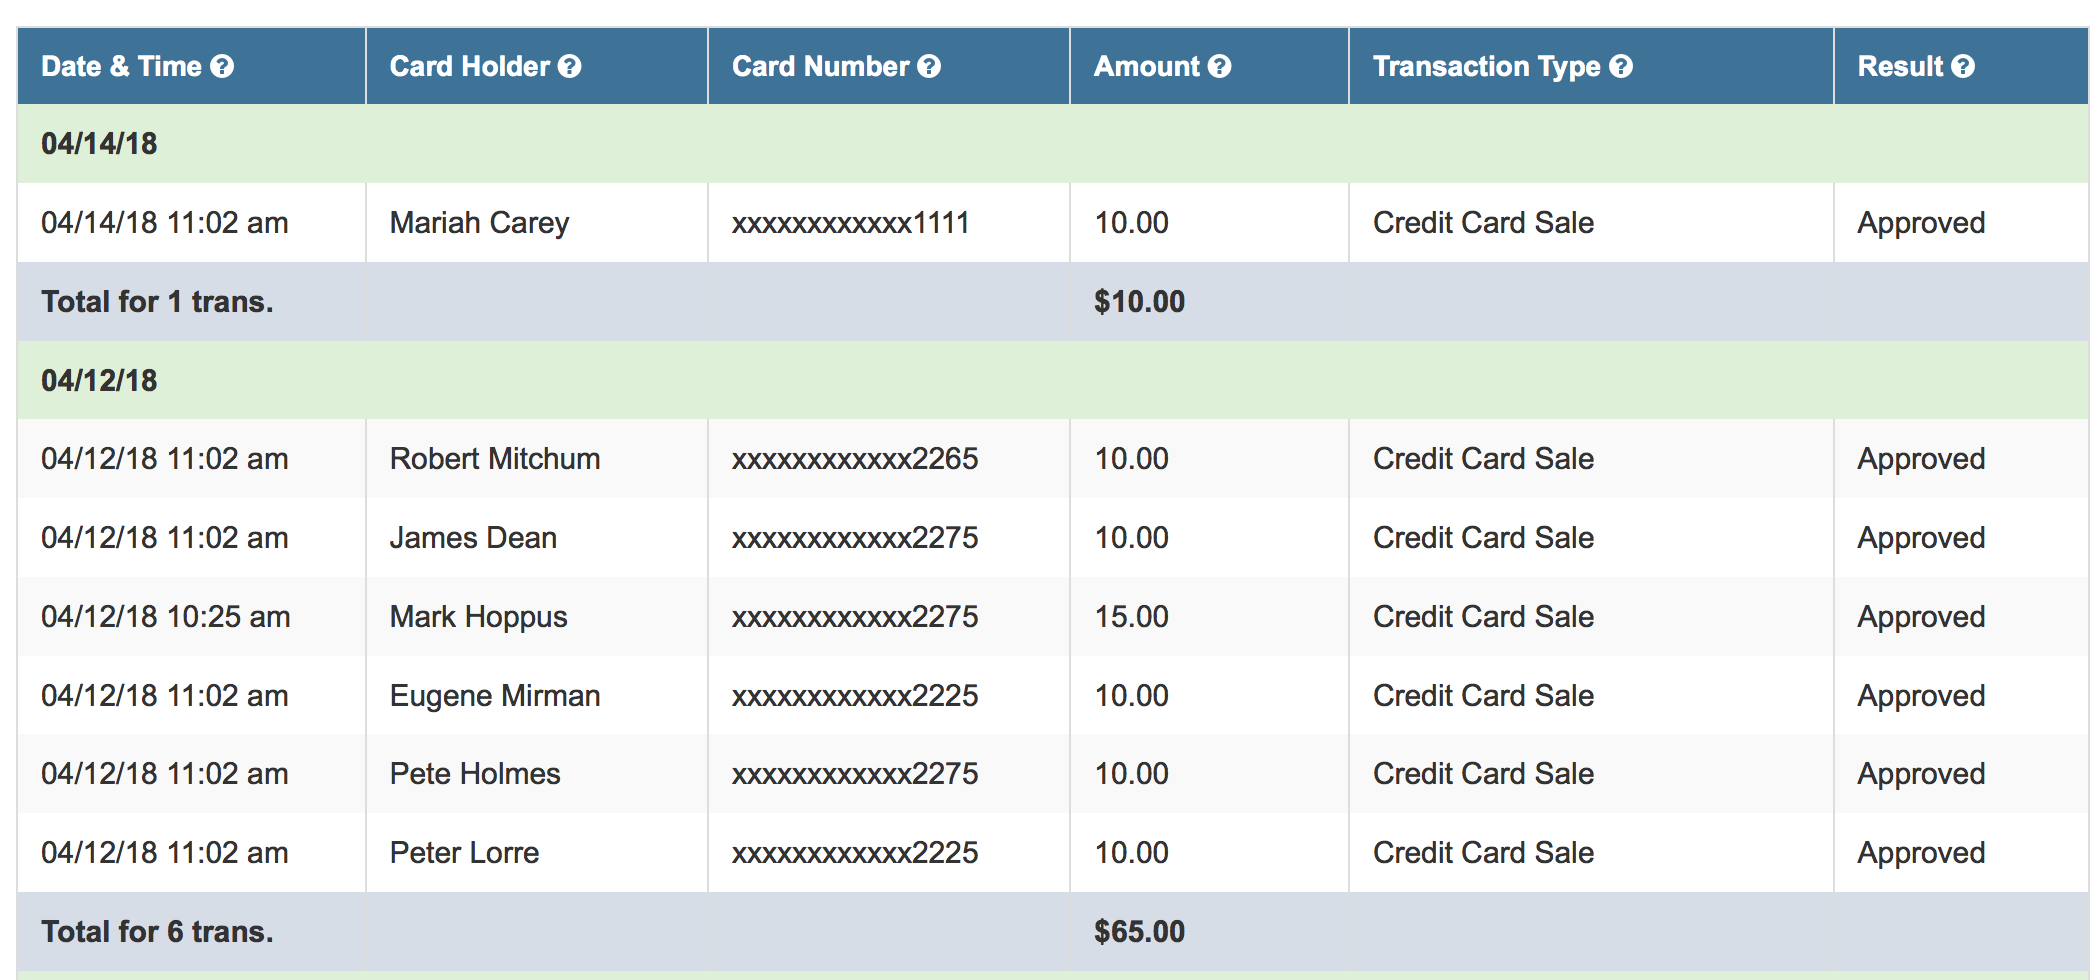
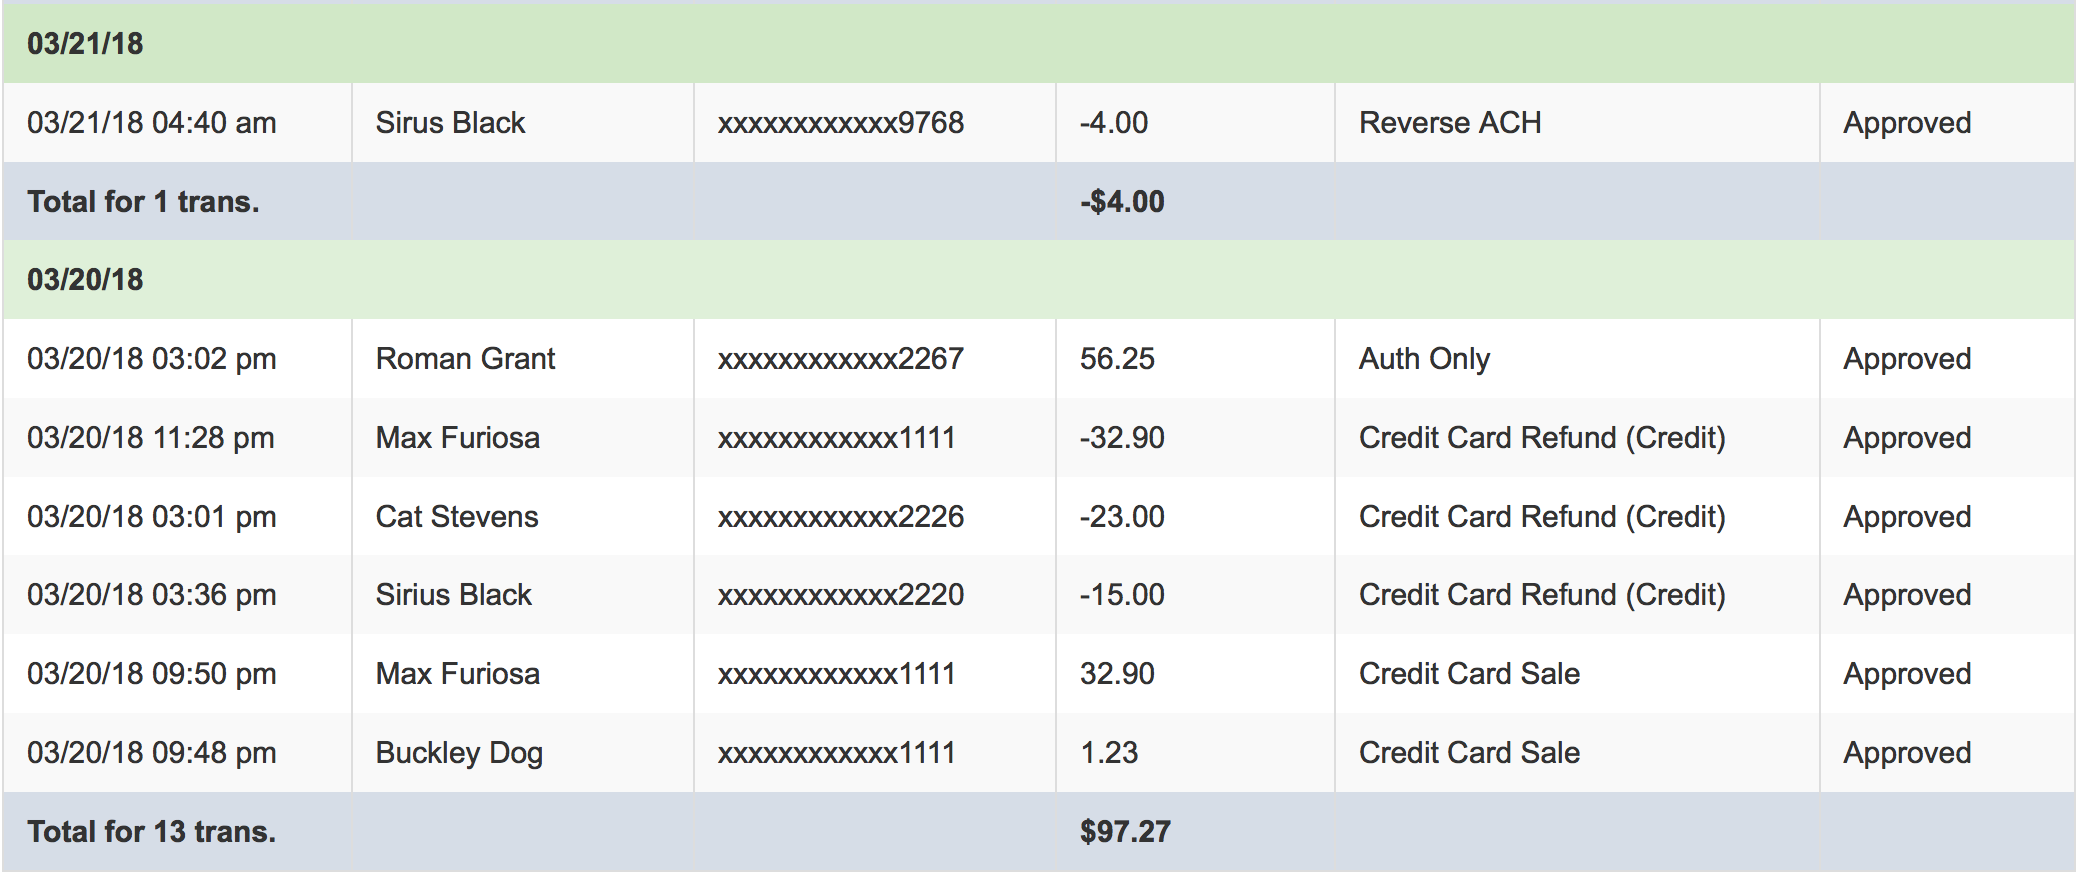
You also have the option to check the box "As Summary". This summary option will group the transactions by this field. When you choose to sort by date and check the summary option. You will see totals for each day of transactions within the report like below:
You can sort by more than one field. The primary sort will be at the top of the list. Below is an example of a report sorted first by date and then sorted by transaction type. You can see that within the day of transactions, the transactions are also sorted by type instead of just by the date and time they were processed.
If you would like to reorder the sort priority, click the arrow icon and drag and drop to reorder the list.
Click the Delete icon to remove a sort.
Once you are satisfied with your sort order, click to continue.
Automated
This feature allows merchants to generate reports on a recurring schedule, and automatically send them to a specified email. This step is optional. If you do not want to set up an automated report, skip to the Saving Report section to complete. To set up an ‘Automated Report’, click + ADD and complete the following fields:

- Schedule- This field indicates how often the report will be generated. Click the arrow to expand the drop down menu and select an interval. Options include:
- Daily
- Weekly
- Bi-weekly
- Monthly
- Bi-monthly
- Quarterly
- Bi-annually
- Annually
- First day of the month
- Last day of the month
- Run At- This specifies what time the merchant would like the report to run. Select the most convenient time for the reports to be run and sent. Please Note: The time is Pacific Standard Time (PST), so remember to make the proper adjustment if in another time zone.
- Start On- Determines the date the automated reports to begin. The date and time must be in the future.
- Email To- This is the email automated reports will be to be sent to. Only ONE email can be entered into this field.
- Email Subject- This is the subject line that will appear in the emailed report.
After these fields are complete click Add to save this automated report schedule. The parameters for the automated report will appear below as seen in the picture below.
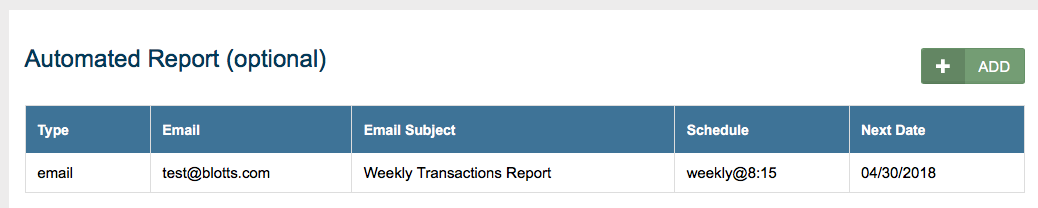
If you would like to set up the report to send to another email, click + ADD again and repeat the steps. If you would like to edit or delete an existing schedule, right click and select "Edit" or "Delete".
Once you have set up your automated schedules continue to the next step.
Saving Report
Report Preview
As you complete each step of creating the custom report, you will see the settings update in the "Report Preview" on the right hand side of the page. This will give you an overview of each section as you enter the information:
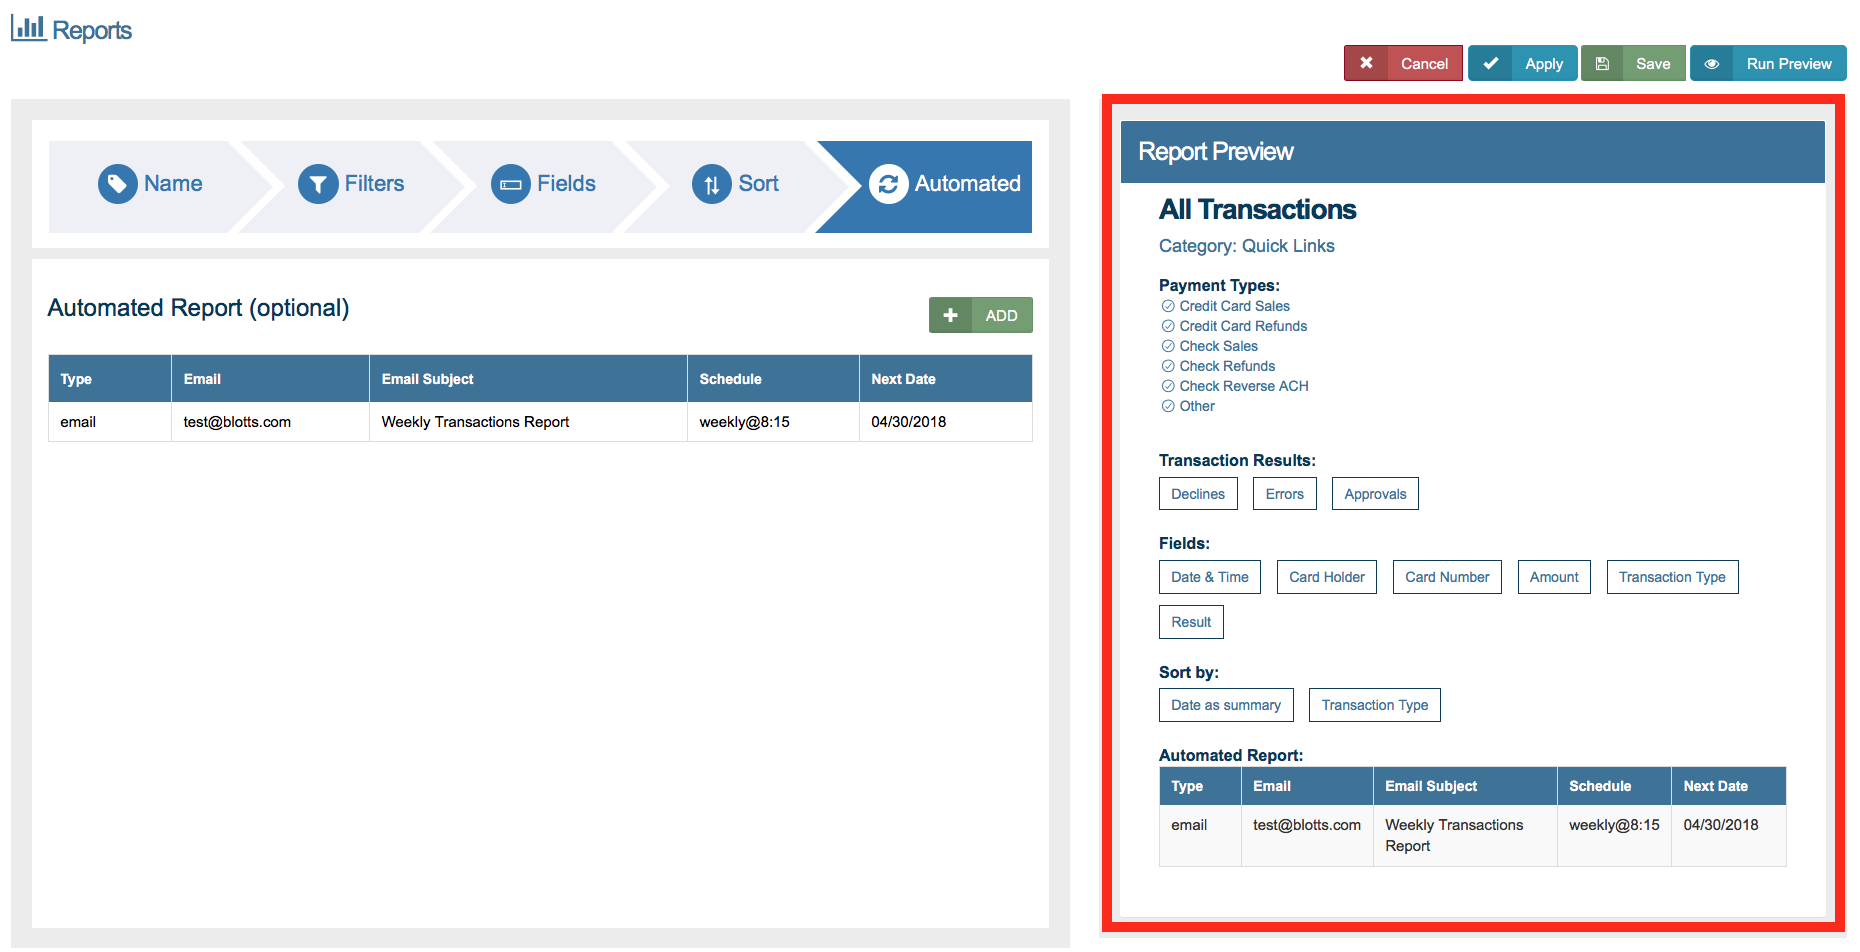
You can check here to be sure everything is correct before saving.
Saving Report/Run Preview
When ready to save the report, go to the top of the page and you will see the following options:

- Cancel: This will discard all unsaved work and return to the Reports home page.
- Apply: Save settings of report up to this point, but stay on the custom report edit page.
- Save: Save settings of report up to this point and return to the Reports home page.
- Run Preview: See a preview of the custom report you have created. Click Back to return to the custom report edit page. Please Note: If you do not click "Back" to return to the edit page, all report settings that have not been saved will be lost.
Viewing Report/Report Options
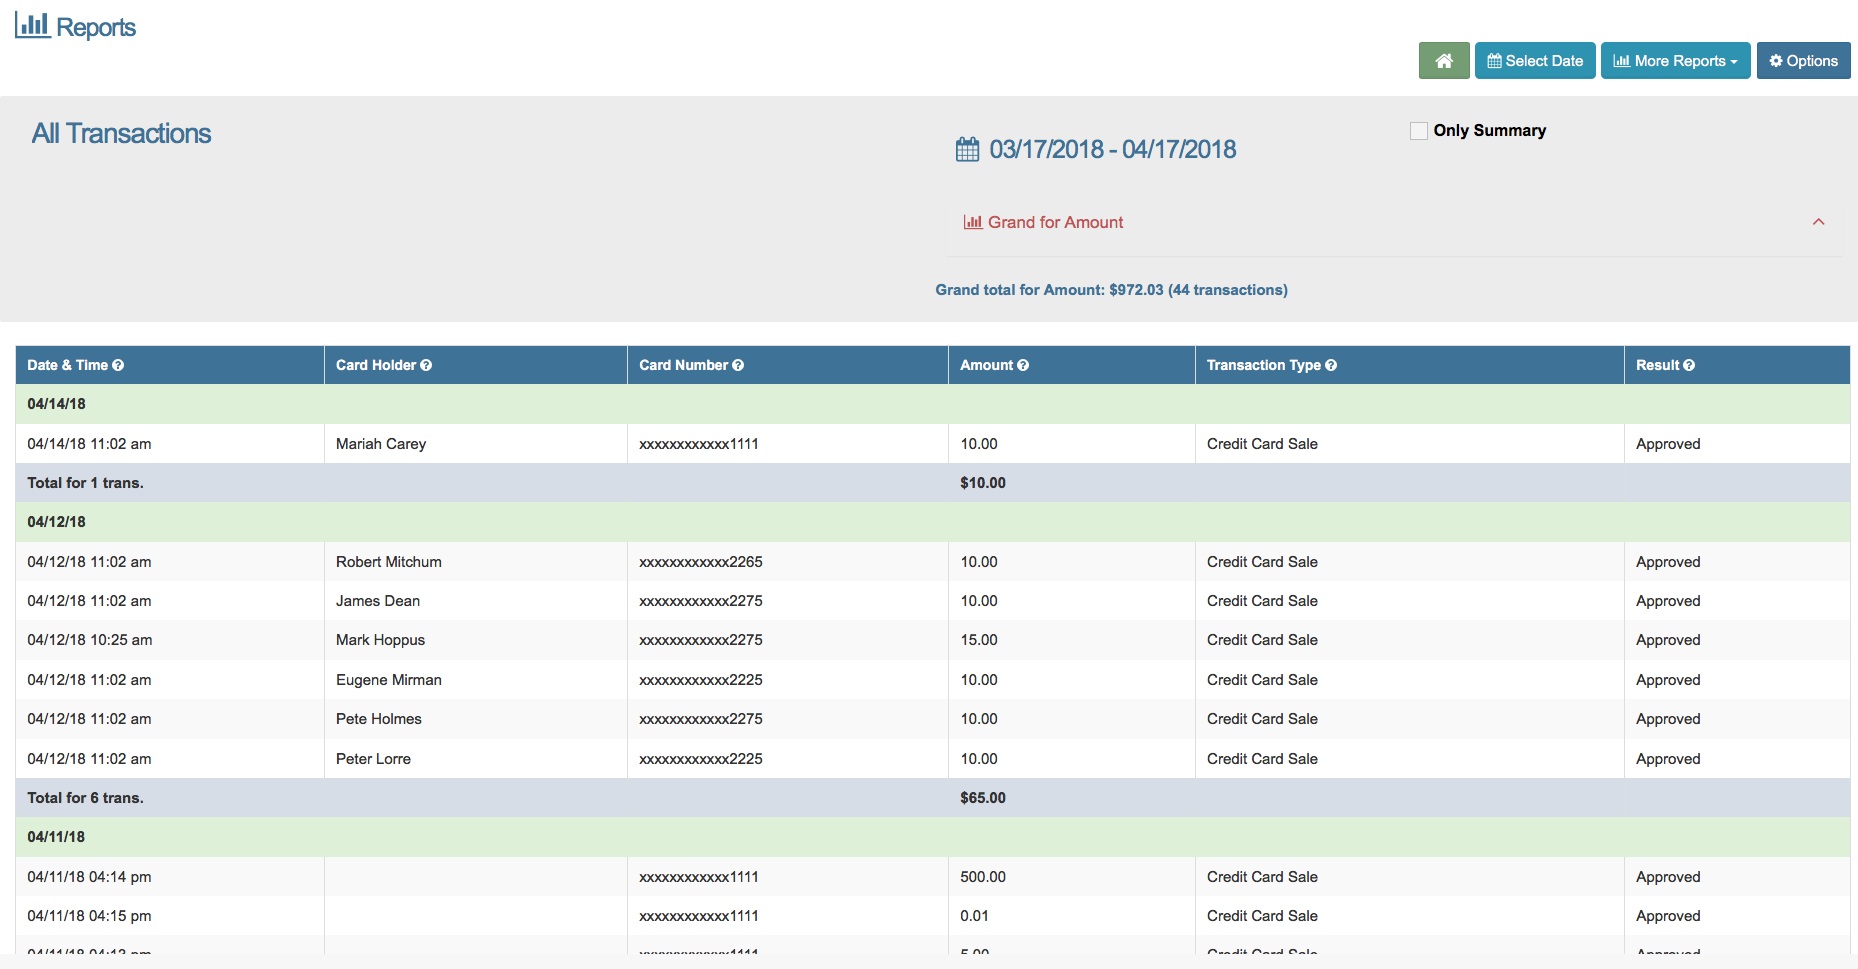
After you have saved your custom report, you should be able to click on the title from the Reports home page. This will take you to your customized report:
At the top of the report you will see some of the Universal Filters/Options including: - Home - Select Date - Options - Custom reports has all options of Pre-Made Reports as well as the additional options listed below: - Clone- Clone the custom report you are currently viewing instead of creating a new report from scratch. This is a good option if you need to create an additional report with settings similar to the one you are currently viewing. - Edit- This returns you to the edit screen to make changes to the report you are currently viewing. - Delete- This allows you to delete the report you are currently viewing.
Custom Report Categories
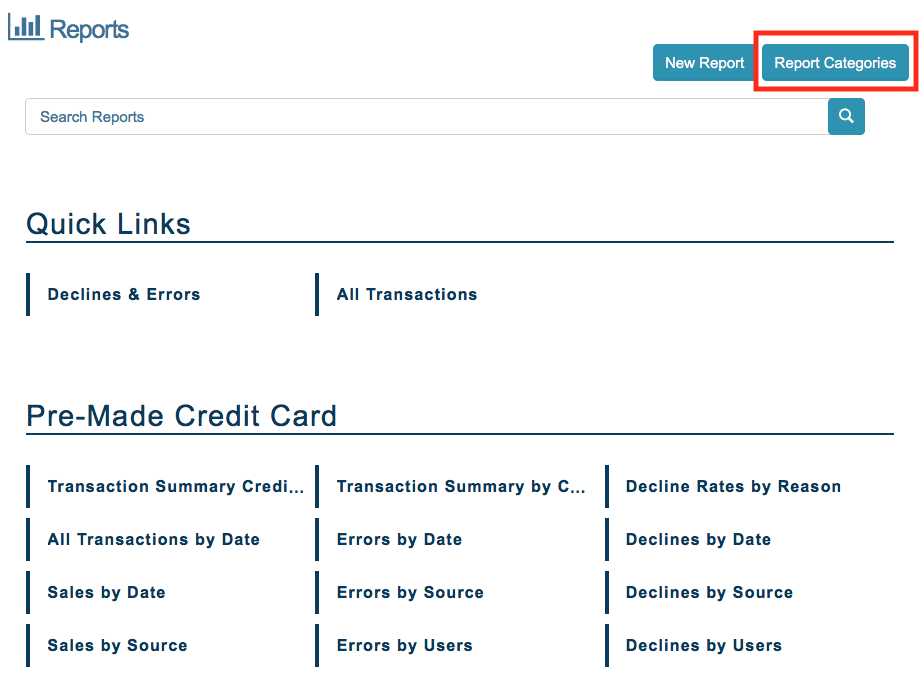
The console allows you to create custom report categories to help you organize your custom report. The default custom report category is "Quick Links", but if you would like to create additional categories, click Report Categories from the Reports home page.
To create a new category simply type the category name into the "Type new category" field and click save.
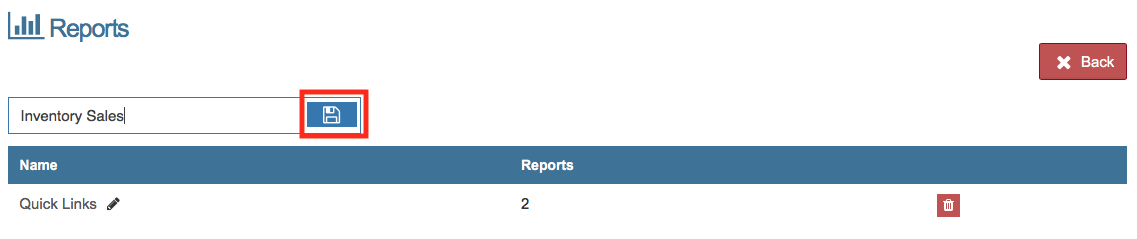
The category will be added to the list as shown below:

Please Note: The new custom reports category will not show on the Reports home page until a custom report has been added to the category. Click here for more information on setting the category for custom reports.
Click  to edit the name of a category.
Click  to delete a category. You will NOT be able to delete a category which currently contains reports.
Click  to return to the Reports home page.
Available Fields
| Transaction Detail Fields | Credit Card Detail Fields | Check Detail Fields | Transaction Result Fields |
|---|---|---|---|
| Date & Time | Batch Date & Time | Check # | Transaction ID |
| Date | Batch Date | Check Account | Transaction Key |
| Time | Batch Time | Check Routing | Batch ID |
| Invoice | Card Holder | Effective | Batch Seq# |
| Order ID | Card Number | Settled | Batch Closed |
| PO # | Bin | Processed | Batch Resubmitted |
| Customer ID | Card Type | Returned | Batch Opened |
| Recurring Cust ID | AVS Street | Bank Note | Transaction Type |
| Description | AVS Zip | Status | |
| Comments | Result | ||
| Amount | Authcode | ||
| Currency | AVS Result | ||
| Native Amt | CVV2 Result | ||
| Conversion Rate | CAVV Result | ||
| Auth Amount | Error Message | ||
| Native Auth Amt | Error Code | ||
| Tax | |||
| Tip | |||
| Shipping | |||
| Discount | |||
| Subtotal | |||
| User | |||
| Clerk | |||
| Terminal | |||
| Table | |||
| Source | |||
| Server IP | |||
| Client IP | |||
| Entry Mode |
| Customer Fields | Shipping Address Fields | Billing Address Fields |
|---|---|---|
| Customer Company | Shipping First Name | Billing First Name |
| Customer Full Name | Shipping Last Name | Billing Last Name |
| Customer Next Date | Shipping Company | Billing Company |
| Customer Country | Shipping Street | Billing Street |
| Customer Phone | Shipping Street 2 | Billing Street 2 |
| Customer Amount | Shipping City | Billing City |
| Customer Website | Shipping State | Billing State |
| Shipping Zip | Billing Zip | |
| Shipping Country | Billing Country | |
| Shipping Phone | Billing Phone | |
| Billing Email |
| Product Detail Fields | Line Item Detail Fields | Custom Fields |
|---|---|---|
| Product Manufacturer | SKU | Custom Customer Fields |
| Product Model | Product | Custom Transaction Fields |
| Product Size | Product Desc. | |
| Product Color | Cost | |
| Product Taxable | Qty | |
| Product Tax Class | Total | |
| Product Name | Taxable | |
| Product Description | ||
| Product SKU | ||
| Product Category |